Hello FJ Friends and Happy Birthday Felicity Jane!
When I held Kolly in my hands and saw the amazing embellishments and the stamps I knew I needed a Birthday Crown! 
Once a year everyone should feel like a Queen/King- right? So I made a birthday crown with the wonderful Kolly! It's not hard at all! I'll show you how you can quickly and easily make this crown!
First I made a sample out of white 12 x 12" cardstock. For the width I made a point at 4", 8" and 12". This is the width of each element. Then - I forgot to do it in the photo - I drew a line from the bottom in height at 3". This is the height of the base.
Now we come to the "tops". To get the height or top of the crown, as you can see in the photo, I drew in from the left at 2" the height at 5 1/2 inches for the first top and drew a line to the left and right to the height of 3". Finished is the first tip. For the other two, I cut the width of 4" in half, drew in the height of 5 1/2 inches in the middle, and then again drew a line to the height of 3" for each.
Since three elements are not enough, I made one extra element. In total we need 5!
I transferred my sample to a patterned paper of my choice and cut it out. I taped the individual elements to the left and right ends with double-sided tape. Now I have the entire length of the crown!

I cut the vellum to a height of 2 7/8 inches. Since the width of 12" is not enough here either, I sewed on a 4 x 2 7/8 inch piece on both the right and left sides with my sewing machine. I stamped on vellum with the awesome Happy You Day! and Mini 3x4 Stamp. I glued the vellum to the base with double-sided tape on the right and left sides after it dried.
To make the crown "stand", I cut out the elements from another patterned paper and sewed them as a "back" to the base with my sewing machine. At the two ends I have the beautiful black ribbon that comes with each kit that I cut in half and glued with double-sided tape between the two papers and sewed it in place!
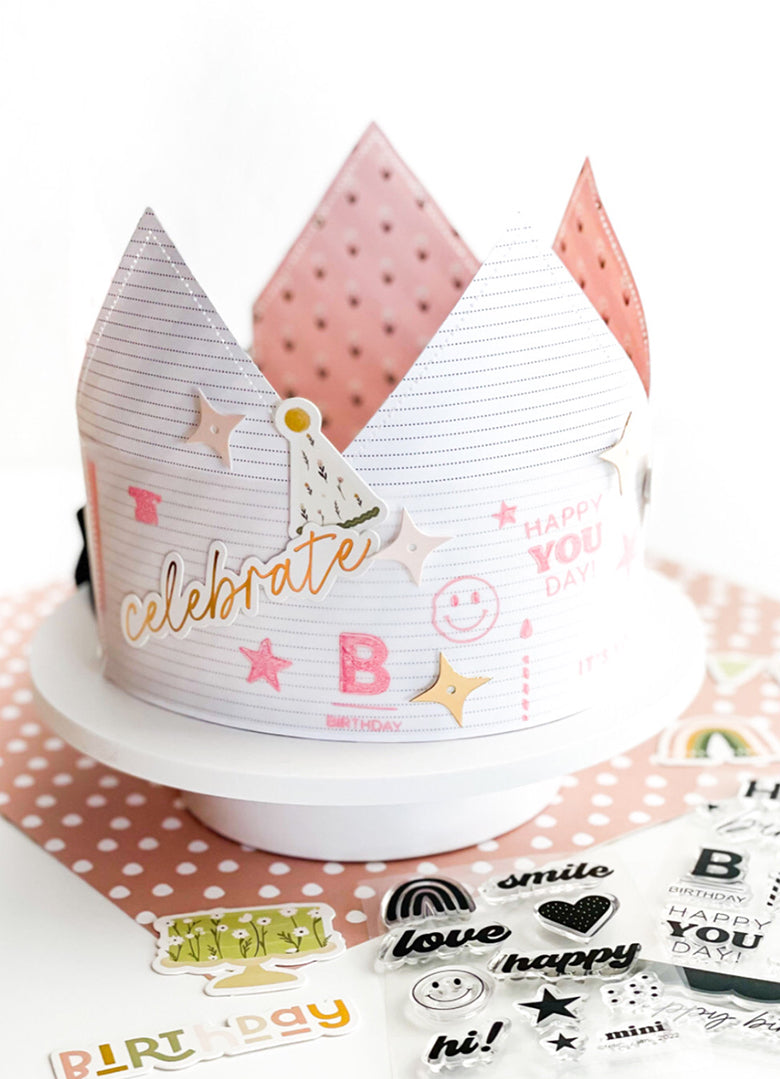
Now I have decorated with different Kolly Die Cut Shapes.
Ready is the Birthday Crown!
I still have one additional idea, but it came to me only after I had taken the photos. To add the age on the Crown, you could add to the amazing Kolly Number Balloon Die Cuts a Velcro piece, the counterpart on the Crown, and you can change every year the age! What do you think of this?
Be sure to see my "How To" IG Reel video on the Felicity Jane Instagram account today. I hope I can inspire you and I‘m already looking forward to your birthday crowns!
See you soon!
Kerstin xx
 SUPPLIES: Kolly Kit | Kolly Paper Pack | Kolly Die Cut Shapes | Happy YOU Day Stamp Set | Mini 3 x 4 Stamp | Kolly Floral Sequin Mix | You Day Metal Die Set