planner pocket | Julie Kinneeveauk
I'm here today to share another SIMPLE project for your planner. I'm all about functionality in a planner, but love that by using some beautiful patterned paper from the Susie kit, I'm able to throw in some 'pretty' as well!
 The Felicity Jane double-sided papers are the PERFECT starting point for adding an adorable pocket in your planner. The hardest part is just choosing which pattern you want displayed!
SUPPLIES used:
One sheet of Felicity Jane paper, a paper trimmer, scissors, washi tape, adhesive, and tabs from the Subscriber's exclusive sheet (which can be made into stickers or printed on regular paper).
 To begin, you simply trim the 12x12 paper down to size. Basically, double the width of your planner sheet and trim accordingly. {Personal size is roughly 7.5" when doubled, and A5 would be 11 5/8"}.
Now fold that sheet in half.
Using the length of your insert {Personal size is 6.75", A5 is 8.27"}, mark where you will fold the bottom of your paper up to create your pocket. I used a piece of paper that was already sized as a guideline.
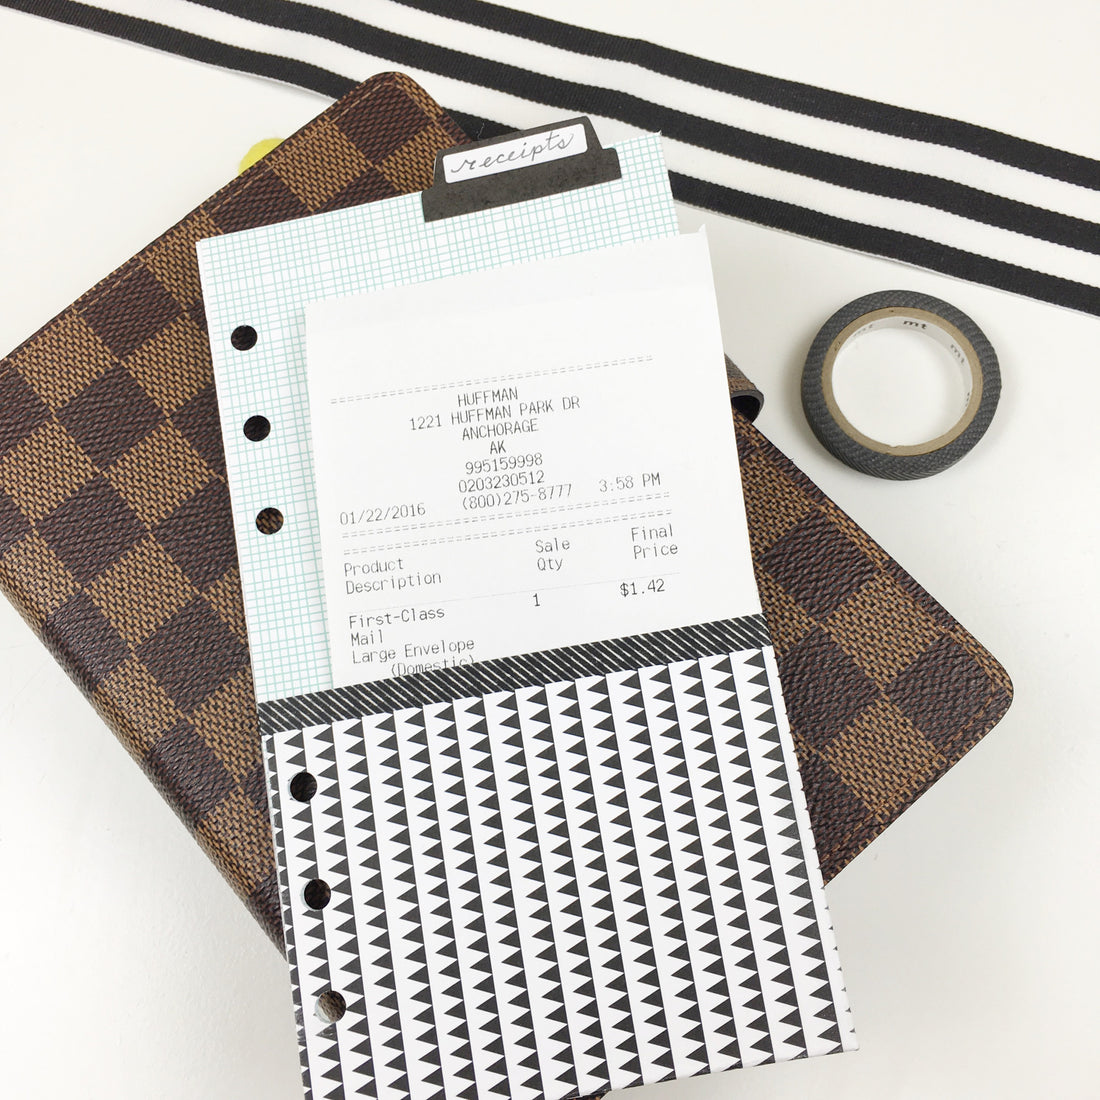
Fold the patterned paper up, exposing a beautiful pattern from the other side. This creates the pocket! If you're creating an A5 pocket, you won't need to trim anything, but if you're working with the personal size, trim your pocket to your desired depth.
I chose to washi across the top of the pocket, tucking my washi tape around so the pocket stayed secure. Then I added some adhesive inside the pocket, holding the front and back together (and hiding away the extra washi tape ends).
Add your hole punches, and voila! A functional AND adorable way to make your planner work for you!

I also added two tab stickers from the Subscriber sheet, back to back and wrote "receipts" because that's what I plan to store in this pocket.
Here's a peek of a different pocket I made for my A5 planner. Couldn't pass up on that beautiful floral. You'll see here I chose to add my washi up the side, vs. across the pocket. So many possibilities!

I've also included a video so you can watch the easy steps and follow along as you make your own! :)