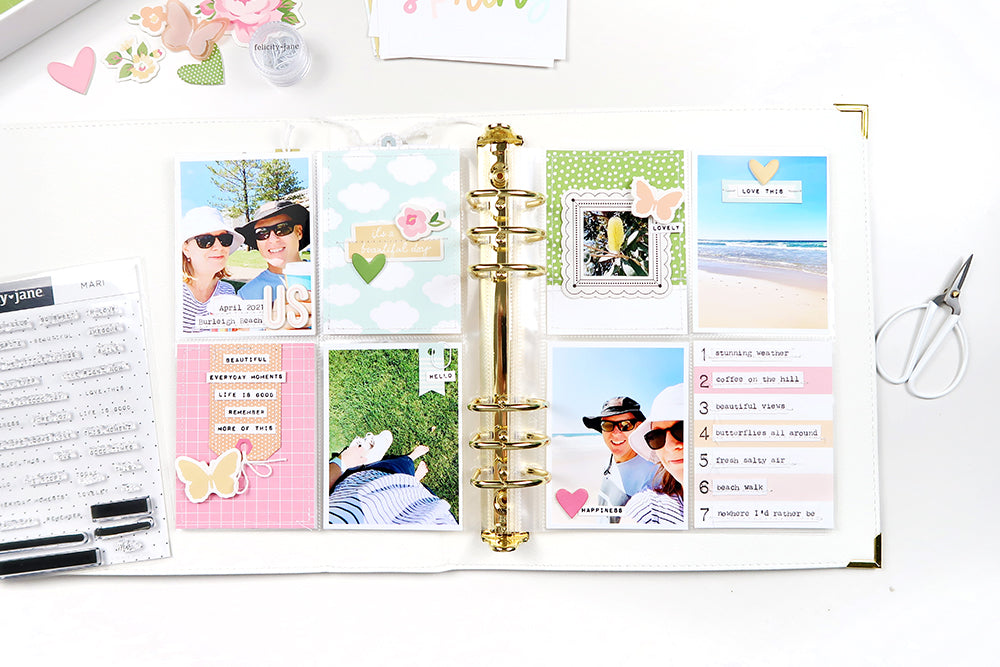
April Pocket Page Spread | Sheree Forcier
Hello FJ Friends!
One of my favourite things in the beautiful Mari kit this month is the journaling cards. I love them! There is such a gorgeous mix of colours and such a great variety of cards to choose from I couldn’t wait to dive into a pocket page spread!

It’s autumn here in Australia right now but we are having the most beautiful weather and it feels just like spring…crisp cool mornings and warm, sunny days…just perfect! I decided to document one of our beach walks from this week for this spread and the Mari kit made it come together so easily.

I chose the pink grid, clouds, green dots and numbered journaling cards to go along with my photos.

Once I had decided on the placement of each photo and card I started choosing embellishments. For the first photo, I used my typewriter and white cardstock for the date and location then added them to the bottom right of the photo with the word “US” with the lovely Mari chipboard alphabet stickers.

I stitched a border around the cloud card, then added the “it’s a beautiful day” die cut piece along with two chipboard pieces…a flower and a green heart. Stitching was also added across the die cut for added texture.

At the bottom of the first page is the pink grid card. I stitched a border around this card and the orange die cut tag, added twine and layered the tag onto the card. I then stamped up five of the phrases and words from the Mari Stamp Set onto white cardstock, cut them out and adhered them down the tag. To finish this card off I added a die cut butterfly at the bottom left with foam adhesive to add a little dimension.

To the right is another photo. I kept the embellishing simple for this one, just adding a die cut, miniwide paperclip and another stamped word.

At the top of the second page is the green dotty card. I added stitching to this one too, then framed a two inch square photo with the frame die cut before adding it to the centre. I then added another die cut butterfly and a stamped word to the top right of the frame.

For the photo of the beach, I added another stamped phrase to a label die cut, attached it with some staples and added a chipboard heart at the top.

The photo at the bottom left of this page was also embellished with a chipboard heart and stamped phrase .

For the journaling on the numbered card, I used my typewriter and white cardstock to type out each line then cut them out to fit next to each number. I then finished off by stitching across each line of text.
All I had to do then was slip each card and photo into my album.
I have a video for you below if you'd like to see my process...
I really love the mix of colours on this spread!

I hope I’ve given you some ideas you can use on your next pocket page project. Thank you so much for joining me on the blog today!
Sheree x

SUPPLIES: Mari Kit | Mari Journaling Cards | Mari Chipboard Shapes | Mari Die Cut Shapes | Mari Chipboard Alphabet Stickers | Mari Stamp Set | 12 x 12 Essentials White Cardstock | Essentials Miniwide Paper Clips - White | Page Protectors Variety Pack - Coco | Coco 6 x 8 Album - Bold Stripe
