Be Happy Layout | Ulrike Dold
Hi FJ frineds,
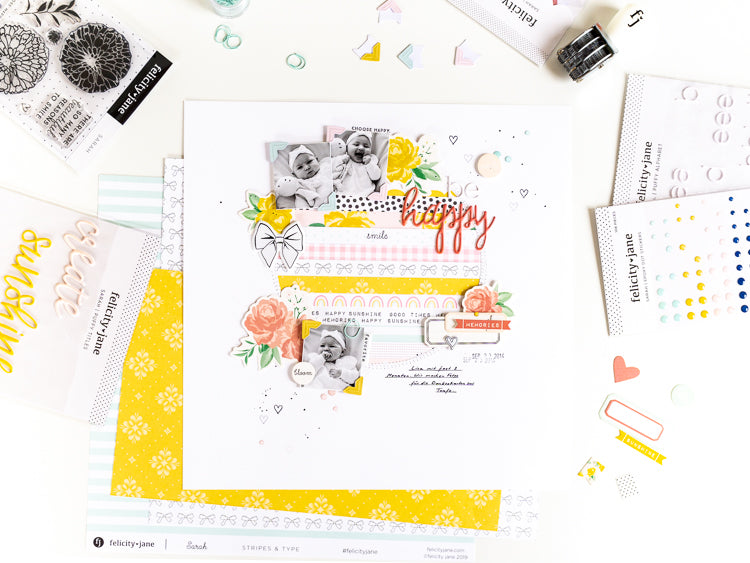
Ulli here with you today and I have a layout with the gorgeous new Felicity Jane Sarah collection for you. I was so inspired by the super cute photo corners and the paper stripes from the patterned papers and so I’ve created a multiple photo layout with many thin paper stripes.

First I searched after a picture series and I found 3 adorable shots from our daughter when she was 3 months old. To add many of the wonderful new photo corners its the best to add more than one photo. So you can play also with the different colors. I cut my photos out and added on every photo two photo corners in the same colors on two corners. I added them diagonal - always on the left corner above and right corner below.

Then I cut out a circle with my die cutting machine. I used the wonderful FJ Essentials white cardstock in 12 inch and cut out a circle with 6.5 inch diameter. Then I cut the thin paper stripes from the patterned papers below and some of my favorite Sarah patterns. I decided that I would use only the pink, yellow and the green colors for my layout because I wanted to keep a girly touch. Then I glued them behind the circle. I mixed the black and white paper stripes every now and then between the colored ones and I love the playful effect. When the circle was backed completely I added a squared paper rest behind the circle to stabilize it. Then I stitched with my sewing machine and white thread several times around the circle.

I added the three pictures with the adorable photo corners on the border of the circle. To make it more interesting I added one of the pictures on the circle below. I used 3 D glued dots to add more dimension. I also added one of these cute mini wide paper clips in mint and decorated the photos with the wonderful flowers from the Sarah Die Cut Shapes in yellow and rose.

For the title I used the pretty „Happy“ puffy title and the small white Jill Puffy Alphabet and glued it on the right side above on the border of the circle.

Then I used the cute tags and the „Memories“ banner and layered them with 3 D glue dots on the right side below. I used a ruler to make some lines for my journaling under them.

I splattered some black ink across the page and wrote my journaling on the layout. To add the date of these pictures I used the FJ date roller stamp. Do you have one of them too? I love this roller stamp so much and I use it nearly for every page I make!

Because of the cute bow of my little girl I decided to use also the Puffy Shapes from the previous Brie collection from last year and added the big bow, a little heart and the „favorite“ puffy sticker on my layout. Felicity Jane kits are so versatile and I love it to mix embellishments from previous kits when I’m working with the newest collections. They match always and you can’t go wrong with them.

In the end I finished off my page with some of these super cute Sarah stamps and the wonderful Sarah Enamel dots in mint, pink and yellow fitting the color palette from this layout.

I hope you like my layout and I could inspire you to work with your gorgeous Sarah collection. Thank you for stopping by today! Until the next time.
xo, Ulli
Supplies:
Sarah Kit, Sarah Paper Pack, Sarah Mini Wide Paper Clips mint, Sarah Flexible Epoxy Dots, Sarah Puffy Titles, Sarah Die Cut Shapes, Sarah Stamp Set, Sarah Photo Corners, Brie Puffy Stickers, Jill White Puffy Alphabet Stickers, FJ Date Roller Stamp
