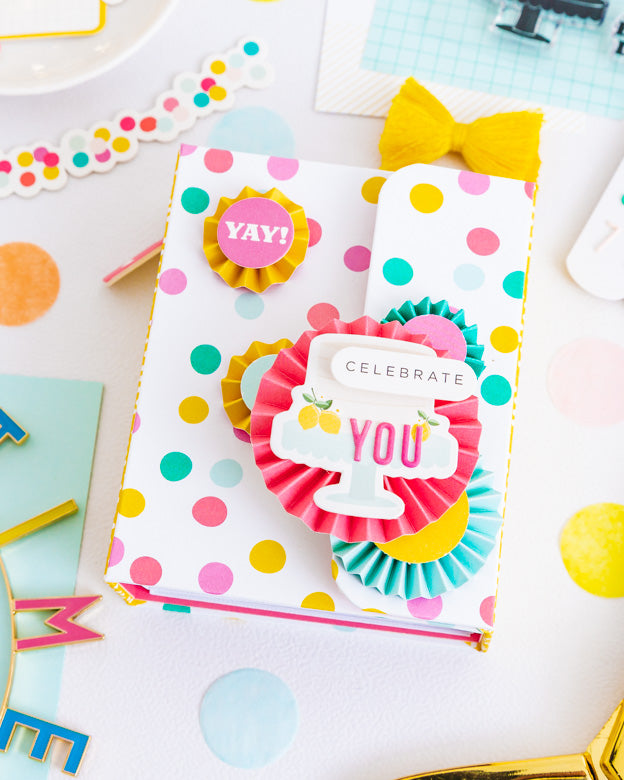
"Celebrate You" Mini Album | Celes Gonzalo
Hi lovely crafters! How are you? Do you want to create something beautiful today? We are going to celebrate a birthday in a special way! Using the new “Annie” Collection we are going to make a colorful and fun mini album with removable pages… Yes! This beauty has removable pages YAY! Let’s get started!
The central element of the mini albums are the journaling cards of the “Annie” collection. These are going to be our removable pages. To create this mini album we are going to use some cardboard. We need 5 pieces of: 1- 3 1/2” w x 4 1/2” h, 2- 3/4” w x 4 1/2” h, 3- 3 1/2” w x 4 1/2” h, 4- 7/8” w x 4 1/2” h, 5- 1 1/2” w x 4 1/2” h. Remember to use them in this order.
Once you have all your cardboard pieces, choose three papers from the “Annie” Paper Pack. Use: one for the three covers, one for both spines and the last one for the interior of the structure (we have to glue all pieces together before using this paper).
We must cover all the cardboard pieces with the papers. Remember to leave an extra inch on both sides of the two pieces that are the spines of the mini album. We glue all the pieces to form the structure of the mini album and begin to decorate the cover. 
Cover: for the cover I used some die cuts and I prepared 5 paper rosettes. For them I used paper strips of: 1”, 3/4” and 1/2” (score every 1/4”). I cut some circles of paper for the center of each of them. Once they are ready you can start to glue them in layers (three on the small flap) and the others on the cover. It’s a very fun way to decorate it! Also I added the word “YOU” using the “Confetti” Puffy Alphabet Stickers. 
Album spine: decorate it with one tiny tag, an eyelet and a decorative chain.
Interior: we are going to make an accordion so we need to have a piece of white cardstock of 20 3/4” w x 4 1/4” h. Score it in: 3 1/4”, 3 1/2”, 6 3/4”, 7”, 10 1/4”, 10 1/2”, 13 3/4”, 14”, 17 1/4”, 17 1/2”. You can cut two pieces of white cardstock and glue them tighter to have a piece with the final measurements. 

We are going to use some of the journaling cards as pages and we need to cut some extra pieces using the paper pack. To the journaling cards we are going to add small velcro pieces to make them removables. Combine them as you like and use some die cuts and stamps to decorate pages. As we made the journaling cards removables, we are going to be able to add photos and write memories or add some extra embellishments.

An extra detail that I made for the interior is an extra removable card to write the birthday wishes. 

I hope you liked the idea and found it inspiring.
Thanks for stopping by ;)
See you next time!

SUPPLIES: Annie Kit | Annie Paper Pack | Annie Die Cuts Shapes | Annie Journaling Cards | Tori Stamp Set | Annie Tiny Chipboard Tags | Confetti Puffy Alphabet Stickers
