December Album Days 1-2 | Lindsey Lanning
Hello everyone, it’s Lindsey! Today I’m sharing my first two days of my December album and how I’m mixing in some past holiday collections as I work with the Noel Collection. You can find my process video at the end of this post for more details on how these pages came together.

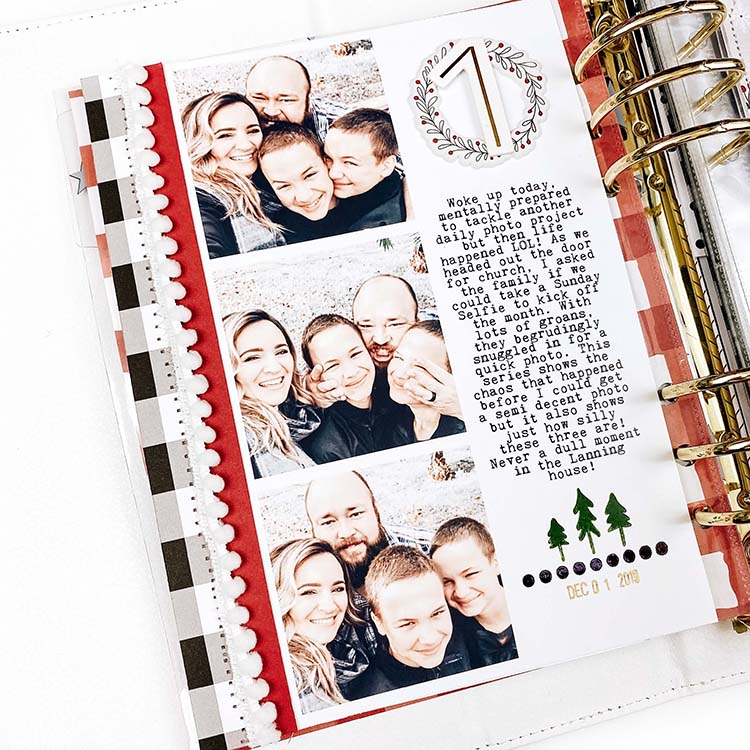
For Day 1, I had this trio of photos that my family took on our way to church. I love how they capture the boy’s and my hubby’s sense of humor so I wanted the photos to be the center focus.

When editing the 6x8 page, I left enough room on the side to add some layered papers and pom pom trim. For the trim, I’ve found it helpful to add a strip of double sided adhesive to the page first and then I use a zig zag stitch to make sure that the pom pom trim stays on over time.

The rest of the embellishments for this page were kept simple...I layered one of the chipboard numbers on top of the puffy wreath and added some stamping underneath the journaling. I love pulling out past holiday kits and mixing and matching them, especially stamp sets since it can be difficult to incorporate them throughout the rest of the year.

I love to include lots of tags in my album since they are a great spot for additional journaling but also add a fun interactive element if you are using a lot of pocket pages. I had forgotten to punch my holes before typing out my journaling but the new acetate pop-ins saved the day and made it so I could still insert the tag into my album without having to remake it.

I die cut the tag shape from some patterned paper and Essentials White Cardstock and stitched them together around the pop in piece. I die cut a doily shape from some printed vellum to layer behind the chipboard number and holly shaped die cuts that I created. I love the texture that you get with the vellum and love that it comes in a variety of prints (I hope we see some more in the future!)

I ran the tag through my typewriter but made sure to leave some room at the top and bottom for embellishment. The cluster at the top is a mix of Noel, Holly, and Joy ephemera.

To finish off the tag, I added a couple of pieces of washi tape to the bottom to bring in a little more color and pattern so it wasn’t so plain.

I kept Day 2 really simple and just added some photos to one of the 4-pocket pages to go along with the journaling on the tag.. My son had a doctor’s appointment where he got the all clear that his broken foot was finally healed so I wanted to be sure and get that documented. I added some stamping and gold puffy stickers to a journaling card to customize it. I love that the Felicity Jane journaling cards leave you some space for embellishment so that it can be tailored to the specific project you are working on!
Be sure to watch the process video to see how the layouts came together and it’s not too late to grab some holiday goodies and start documenting your December memories!
Until next time!
<3 Lindsey

SUPPLIES: Noel Christmas Kit | Noel 6x8 Album - Black Polkadot | Noel Stamp Set | Essentials White Cardstock | Noel Paper Pack | Noel Washi Tape | Lindsey Buffalo Plaid Washi Tape | Page Protectors Variety Pack 6 Hole | Mini Pom Trim - White | Noel Gold Foil Puffy Title Stickers | Noel Puffy Stickers | Holly Word Stickers | Holly Die Cut Shapes | FJ Roller Date Stamp | Jill Designer Vellum Sheets | Joy Die Cut Shapes | Noel Chipboard Numbers | Autumn Stamp Set | Essentials - Acetate Pop-Ins
