December Album | Eva Pizarro
Hello everyone, it's Eva on the blog today sharing my progress with my Bella December Album. 
This is my first time documenting this month and I am super excited to be using the Bella kit. I love that it has everything I need to create a gorgeous album. First, let me talk a bit about the Coco Album. It is truly a gorgeous 6x8 album, it has gold details and plenty of space to add photos and journaling. It comes with the plastic sleeves so you only need to add your memories.
I decided to write all my journaling on the computer and then transfer it to the pockets cards. To do that you first will need to scan the cards. I backed them with a letter size paper and opened my file on an editing program. 
Next, print the journaling cards on plain paper. Use black and white or an economic setting. Place your journaling cards on top of the printed card and hold them with washi tape. 
On your computer, remove the scanned image of the cards so you print only the journaling. 
I love my handwriting but I think it is nice to add some printed journaling also!
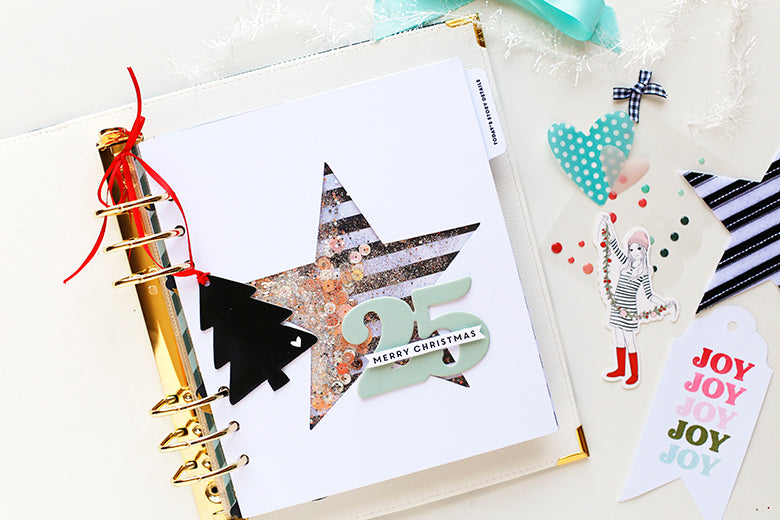
Now let me walk you through the pages. This is my cover. I used the cardstock dividers and created a shaker pocket with some glitter and sequins. On top of my divider I used one of those awesome chipboard numbers and that chipboard tree that came with the kit. 
The first page of my album has a month's overview. I also used the cardstock dividers and embellished some days with the Bella stamp set. I always have lots of events in December, including 4 family birthdays! 
And look how cute this divider is! All I did was use the stencil to apply some gold paste on top. It is not perfect but I am ok with it! I love that you can peek the next page a bit. 
I didn't document every day of December. I included only highlights and some important December stories. I kept everything pretty simple. Each page has 2 photos, one title card and one journaling card. Here, I used the vellum hearts in the middle, some chipboard shapes and the label stickers to add a title to my photos.

I used one 3x8 sleeve to create a shaker and embellished it with some die cuts. Again, I used the same composition as the last page: two photos, one title, one journaling card, stickers and a label sticker on the photos. 
I love to add big pictures and this one had to be it! We usually decorate our tree December 8th, and that was the story for this day. That lovely journaling card with the colorful tree was perfect! 
This is another cardstock divider. It was white but I decided to cover it with patterned paper and then I wrote about the best moments of this December. Those numbers from the Bella Cardstock Alphabet were perfect to add a small caption to all my windows. 
Here are some more pictures from the next days. I still have to finish but I am half way already!


As you can see, documenting December doesn't have to be complicated. I used the same recipe for all my pages and the important part is that all my memories are being recorded in an album! Using a kit made things really easy and fun, plus the Bella kit is lovely and has a beautiful color palette.
Thanks for joining me today and for reaching the end of this post! Have a wonderful New Year,
Eva

SUPPLIES: Bella Christmas Kit | Bella Paper Pack | Coco 6x8 Album | Bella Stamp Set | Bella Chipboard Numbers | Bella Gold Foil Puffy Alphabet Stickers | Bella Die Cut Alphabets & Numbers | Bella Cardstock Dividers | Essentials Label Stickers No. 6 - Bella | Bella Puffy Stickers | Bella Felt Stars | Bella Die Cut Shapes | Bella Chipboard Bits | Bella Vellum Hearts | Bella Flexible Epoxy Dots | Essentials Retro Star Stencil | Bella Journaling Cards | Bella Library Cards

1 comment
Eva,
Your layouts are amazing! I Love them all! I especially like the top that you used a similar recipe from page to page to make things easier. I tend to make things well more complicated then need be, so thanks for the reminder as I’m still working on my DD. Question, do you have any tips on how you were able to align the diagonal striped paper with all those windows and cut them out once they were covered up. How did you go about that? TFS!