December Album Page feat. the Christmas Memory Game Tiles | Sheree Forcier
Hello friends!
Did you see the adorable new Christmas Memory Game released in the Felicity Jane shop last week?

It’s such a fun gift idea for kids or families this Christmas, but it was also designed with memory keepers in mind! Of course the first thing I thought of when I saw the 3 inch chipboard tiles in the game was that they would be perfect to use for so many different project ideas! I couldn’t wait to start creating and really wanted to include some in my 2022 December album.

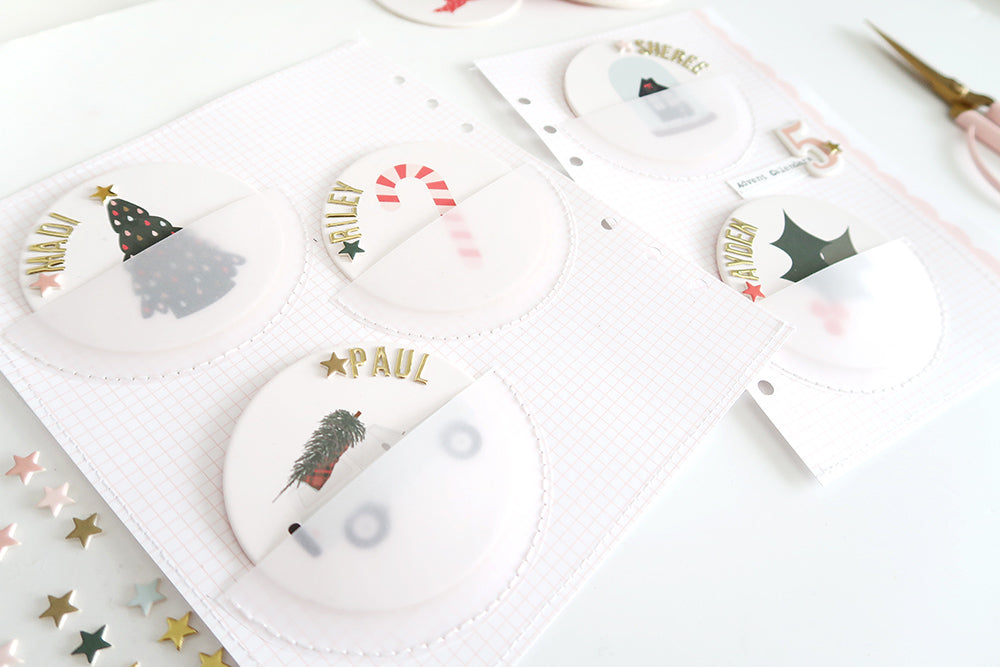
The first project I’ve created with the chipboard tiles is a spread documenting our advent calendars for this year. I always choose to document this on Day 5 since there are five of us in the family.
I chose the pink grid paper from the 12 x 12 Grid & Dot Grid Paper Pack for my background pages. The first page of the spread is 7” x 8.25” and the second page is a little smaller at 5.25” x 8.25”. I punched 6 holes down the side of each so they can slip into my album and added a pink scalloped strip down the right side of the second page.
I had thought about attaching the circles to the pages with a brad at the top of each so that you could move them sideways to reveal a photo underneath, however with the three on the first page it was a little crowded for that idea. Instead, I decided to make little pockets for them to slide into. I used a 3.75” inch circle die to cut out some vellum circles and cut each circle in half.

I positioned the vellum half circles across the pages using the chipboard circles as a guide to help get the spacing right.
Once I was happy with the arrangement, I secured each half circle with a small piece of washi tape then pierced some stitching holes around each one before hand stitching them into place.

The washi was removed and I had little pockets for my chipboard circles!

To decorate the chipboard circles I added each person’s name using the Bella Gold Foil Puffy Alphabet Stickers and a chipboard star sticker.

On the back of each circle is a photo and a strip of typed journaling to tell what type of advent calendar each person has. I used a 2 7/8” circle die to cut out each photo then trimmed a bit off the side before adding the typed journaling.

Each circle then slipped nicely into their pockets. I added a chipboard number with another piece of typed journaling on the second page and stitched a border around each page to finish off. I think this was a really fun way to document our calendars this year and the images on the chipboard circles are a super cute addition to my album!


I hope you’ve enjoyed seeing this idea using the Christmas Memory Game chipboard tiles for memory keeping. I hope to share another idea with you soon!
Sheree x
 SUPPLIES: Christmas Memory Game | Ivy Kit | Ivy Chipboard Star Stickers | Ivy Chipboard Numbers | Bella Gold Foil Puffy Alphabet Stickers | Essentials 12 x 12 Grid & Dot Grid Paper Pack
