December Album Pages | Sheree Forcier
Hello everyone!
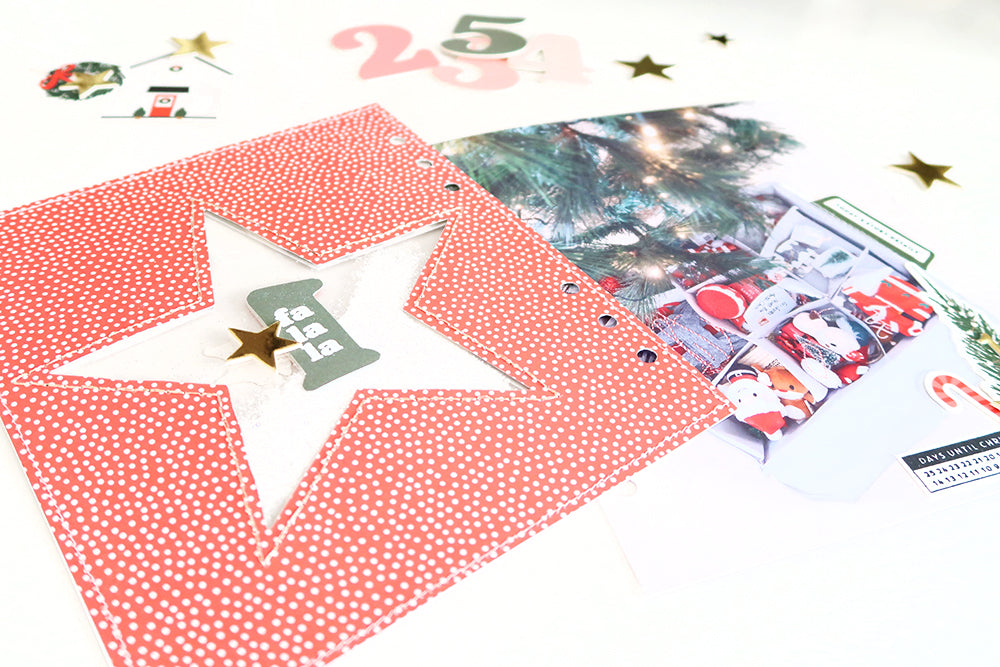
I’m excited to share a these pages from my December album with you today featuring the beautiful Bella Kit and the super fun cardstock divider page with the star cut out…I just had to use it!


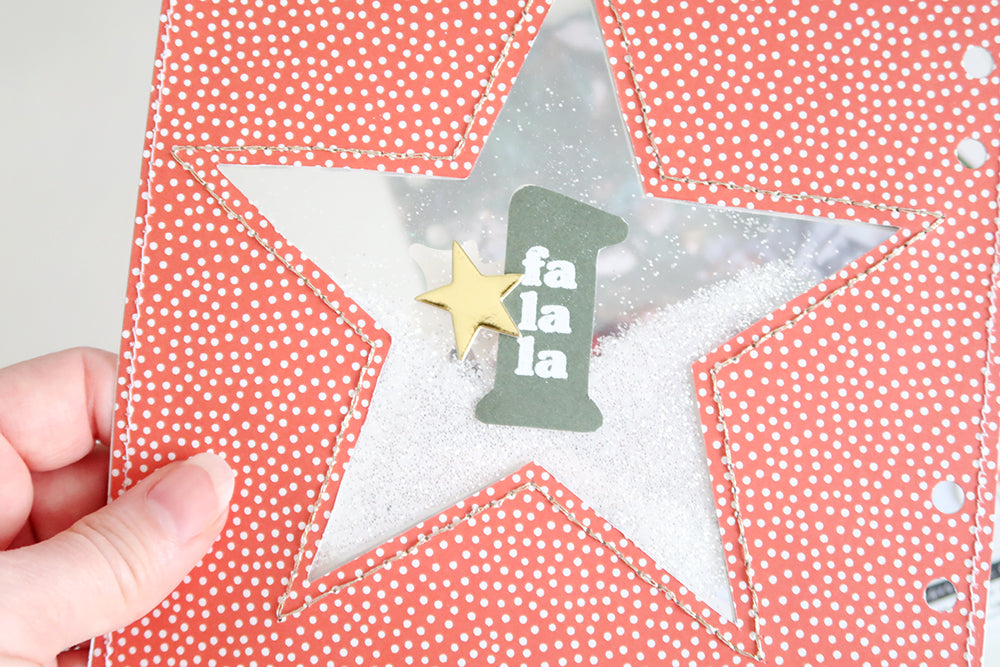
I wanted to keep the star transparent so that you can see the full page photo behind it, while also adding the number to the centre, so I decided to create a shaker page.

I chose the red “Tiny Spots” paper to back the white cardstock divider page with. I cut the paper to 7 x 8.25 inches then used the star divider page to trace the star shape on the back before cutting it out using a craft knife and metal ruler. I then used a paper piercer to create stitching holes around both stars and handstitched each one using gold embroidery thread.
I cut two pieces of acetate from my stash roughly 6 x 6 inches each, positioned one piece over the cut-out star and added some double side tape to the acetate following the outside edge of the star. I then removed the backing from the double sided tape on the bottom half of the star only, and adhered the other piece of acetate on top. This allowed me to add some glitter inside the star shape before sealing it up.
The acetate shaker star was then adhered in between the two star pages and I used my sewing machine to stitch around the outside edge of the page.
Knowing that you would be able to see the back of my chipboard number on the red side of the star page, I decided to back it with some green paper. I cut a piece of solid dark green paper, then stamped and embossed the “fa la la” stamp from the Bella Stamp Set with white embossing powder. I traced around the chipboard number on the back of the stamped paper with a pencil then cut it out.

The chipboard number was adhered to the middle of the star on the white side of the page. I also added a holly die cut piece.

On the red side of the star page I added the stamped green piece and a gold chipboard star.

The first story I usually share in my album is about our Christmas tree. For the past few years I’ve always used a full page photo of our decorated tree but this year I wanted to do something a little different. After we added the lights to the tree I took a photo of our ornament box sitting underneath it. I love how this photo turned out!

I decided to create some hidden journaling by cutting a slit down the right side of the ornament box in the photo. I printed my journaling to 3 x 4 inches, added a die cut tab to the top of the journaling and stitched around the edge. I added stamped phrases to the tab and above the journaling then adhered a 3 x 4 inch photo of our finished tree to the back. The journaling was then slipped into the slit on the photo.

I finished off by adding some die cuts, another stamped piece and a gold foil star to the bottom right corner of the page and a gold foil “1” was adhered to the middle of the die cut tree.
I have a video below if you'd like to see my process...
I hope I’ve inspired you to create a shaker page or hidden journaling in your December album too?

Thanks so much for stopping by the blog today. I hope you have a wonderful, creative weekend ahead!
Sheree x

SUPPLIES: Bella Kit | Bella Paper Pack | Bella Cardstock Dividers | Bella Die Cut Shapes | Bella Stamp Set | Coco Chipboard Stars | Bella 6 x 8 Album | Essentials Puffy Alphabet Stickers – Gold Foil
