"Fresh Air" Traveler's Notebook Spread | Sheree Forcier
Hello FJ Friends!
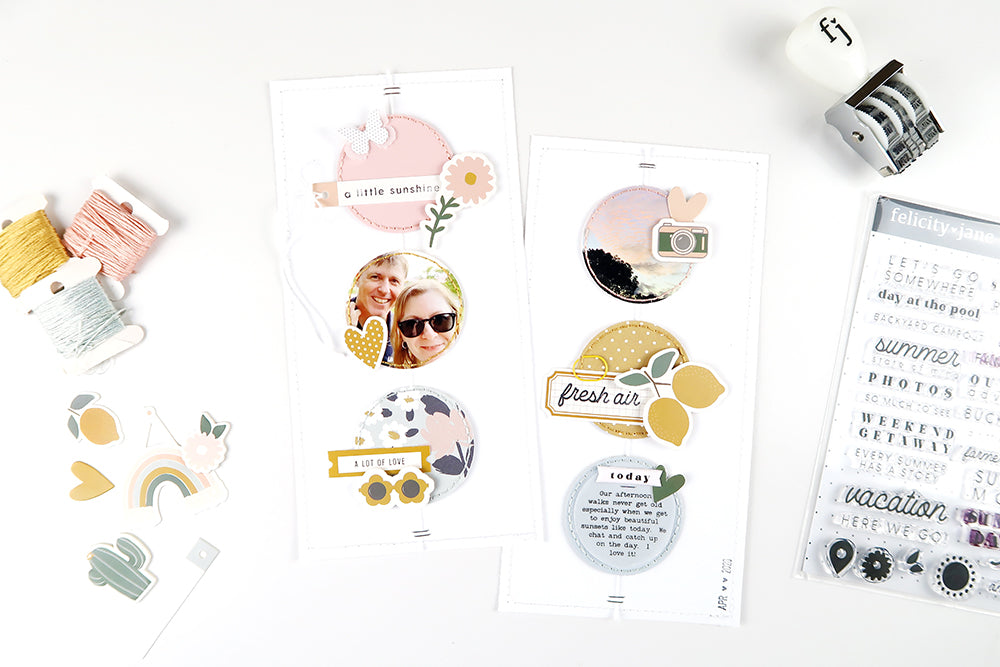
Today I have a traveler’s notebook spread to share with you that I’ve put together with the beautiful Amanda Kit. For this design I decided to play with some circles! It’s been a while since I’ve used circles on a project and they’re so fun!

I used a two inch circle punch to four cut paper circles. Two circles were from the solid coloured cardstock and the other two were cut from the gorgeous floral and mustard polka dot papers in the kit. I also cut two photos into circles as well.
To add some texture to each piece, I pierced some stitching holes around the edge then hand stitched each one with co-ordinating embroidery thread from my stash. It’s amazing what a difference a little stitching can make to any project!

Once my circles were stitched, I used my sewing machine to stitch a border around each of the white cardstock background pages that had been cut to size to fit into my traveler’s notebook. I also stapled a length of white twine down the centre of each page before adhering the circles evenly down each one. I used thin foam adhesive behind the circles to lift them off the page a little and to allow for the twine running down behind each piece. Then it was time for the fun part…embellishing!

For the pink circle I stamped a phrase from the Amanda Stamp Set onto a die cut label, added some twine then layered a die cut flower on top. A layered butterly was also adhered to the top left of the circle.
The photo underneath had a mustard chipboard heart added to the side.

I layered a die cut label and the chipboard floral glasses onto the floral circle at the bottom of the first page. Those little glasses are super cute!

For the sunset photo at the top of the second page I added the little chipboard camera and a die cut heart layered together.

The mustard circle has the die cut lemons and a label that was stamped with another phrase from the Amanda Stamp Set. I also added a mustard miniwide paper clip to the side.
For the blue circle at the bottom of the page, I printed my journaling onto vellum so that it would fit inside a smaller circle before punching it out and stapling it into place. I also added a “today” puffy sticker at the top then stamped the date at the bottom right of the page using the FJ Roller Date Stamp to finish it off.

The pages were then adhered into my traveler’s notebook insert.
You can watch my process in the video below if you would like to see more details...
When was the last time you used circles on a project? I hope I’ve inspired you to dig out your circle punches and dies to create something fun!

Thanks so much for joining me on the blog today. See you again soon!
Sheree x

SUPPLIES: Amanda Kit | Amanda Paper Pack | Amanda Die Cut Shapes | Amanda Chipboard Bits | Amanda Stamp Set | Brie Layered Butterflies | Harper Die Cut Shapes | Essentials White Cardstock | Essentials Miniwide Paper Clip – Mustard | FJ Roller Date Stamp | Traveler’s Notebook Insert
