Happy Life Layout + Process Video | Mandy Melville
Hello everyone, and Happy Easter!
Mandy here today to share a new layout with you! I used the gorgeous ‘Henley’ kit to create this page, but I also mixed in some embellishments from four previous kits! I love the versatility of the Felicity Jane kits, and that they all work so beautifully with one another! Here’s the layout that I created…

On this page I documented a photo of my youngest daughter Eleanor, enjoying a play at the playground. The colours in the photo matched perfectly with the beautiful teals and corals in the kit!
I really wanted to make a feature of the beautiful patterned papers in the Henley kit on this layout, and so I started off by trimming down three vertical strips of patterned paper, and arranging them across the page. I especially love the beautiful floral paper! Next I matted my photo with one of the solid color papers from the kit, and I layered a journaling card underneath the right hand side of the photo. Then I was ready to start embellishing!
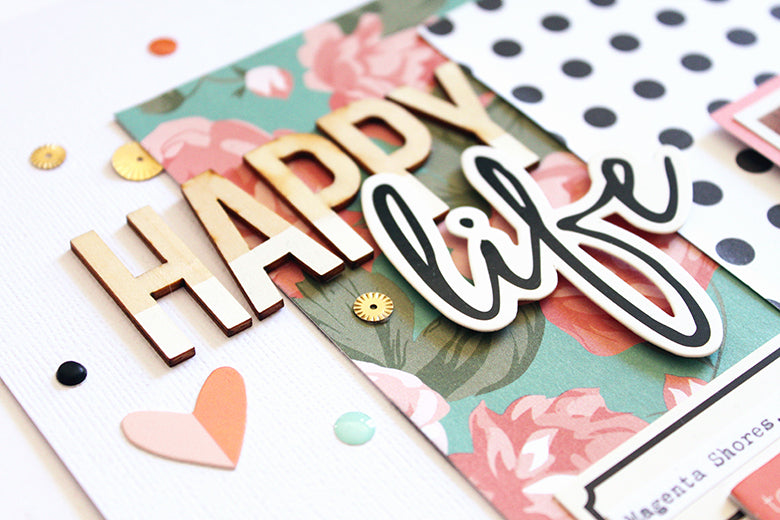
I created my title by combining the paint dipped wood alphabet stickers with one of the die-cuts from the Henley kit. Those alphabet stickers were from a previous kit, and are still one of my favourites! (They are also available to purchase separately in the Felicity Jane shop – see link below).

Underneath the title I layered together a die cut label from the Alexis kit, with a chipboard sticker from the Summer collection. I used the label to add the date and the place that the photo was taken.

I created a cluster on the bottom right hand corner of the photo using a washi sticker, a wood veneer piece, and a die cut, all from the Henley kit. I used a few of the washi stickers on this page, and I decided to stick these onto white paper and fussy cut them before adding them to my page, so that I could use them more like a die-cut. This made the colours on the stickers more vibrant, and it also made them a little bit more sturdy, which meant that I could add foam tape underneath them to give them more dimension.

I finished the layout off with a sprinkling of little embellishments in the top left hand corner of the page and the bottom right hand corner. I included brushed gold sequins, and epoxy dots from the Henley kit, as well as die cuts from the Alexis kit, a silicone charm from the Caroline collection, and a few bitty puffy stickers. I love the detail that these small embellishments add to the page!
Thanks so much for joining me here on the blog today! If you’d like to take a look at how this layout came together, you can watch my process video here…
Mandy x
Supplies: Henley Kit | Henley Paper Pack | Henley Flexible Epoxy Dots | Henley Die Cut Shapes | Henley Washi Stickers | Henley Wood Veneer Shapes | Henley Journaling Cards | Henley Brushed Gold Sequins | Paint Dipped Wood Alphabet | Alexis Die Cut Shapes | Summer Chipboard Stickers | Caroline Silicone Charms | Essentials Bitty Puffy Stickers