"Happy" Traveler's Notebook Spread | Sheree Forcier
Hello FJ Friends!
I hope you all had a wonderful Christmas with you families and friends! I’m so happy to be back on the blog today with a new traveler’s notebook spread to share with you.

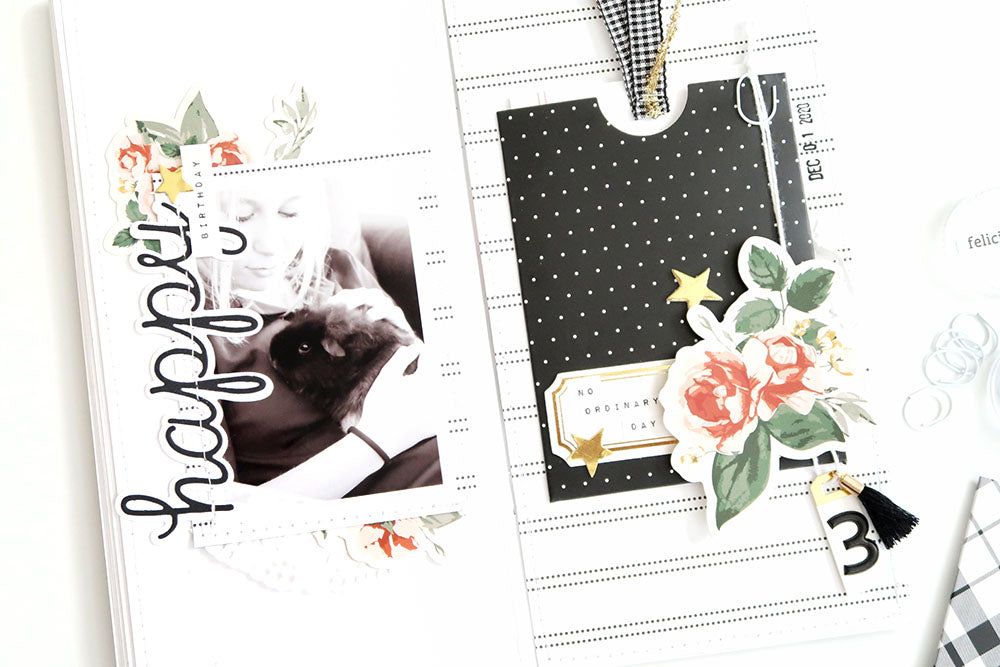
I love that the Coco Kit, even though it is Christmas themed, can be used for documenting so many other things! Today I’m using the kit for a birthday spread along with a few other FJ bits and pieces from past kits. Our little guinea pigs turned 3 years old at the beginning of December and Madison made them their own tiny birthday cakes with banana, zucchini and cherry tomatoes…and they loved it. Of course this needed to be documented!
I decided on plain white for the background of the first page and the Coco Dotty Stripes paper for the background of the second. I machine stitched a border around both pages. I like to create my traveler’s notebook pages separately so that I can add things like stitching and staples before adhering them into my notebook.

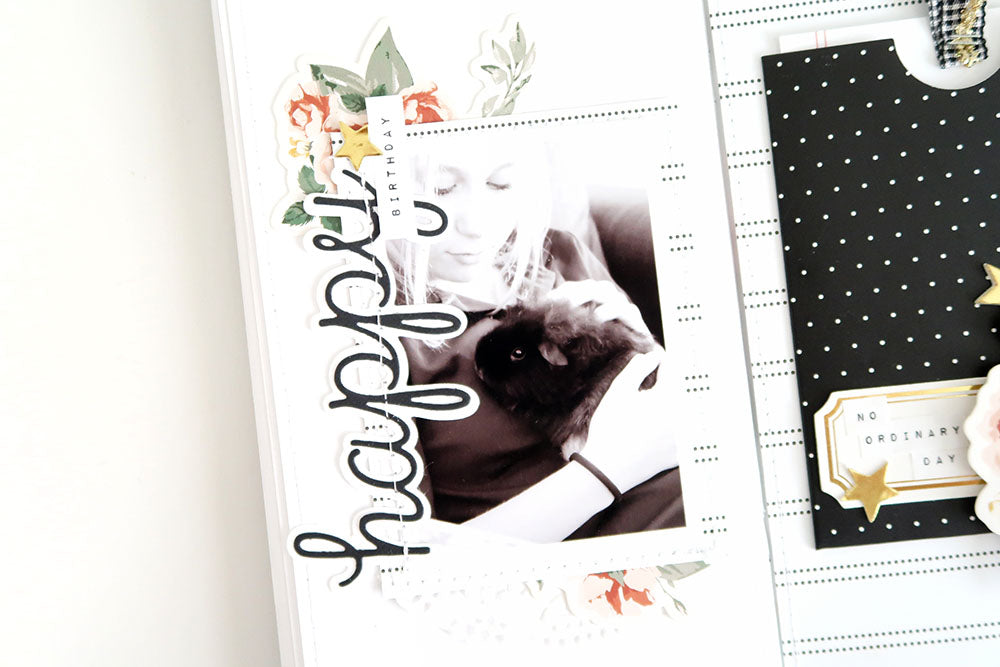
On the first page I backed my 2.5 x 3.5 inch photo with a 3 x 4 inch piece of the Dotty Stripes paper. Stitching had already been added around the edge of the paper. I used the Sarah Die Set to create my title “happy” with white FJ cardstock and a scrap of black cardstock from my stash. The title was adhered down the side of the photo before I added stitching for more texture. I also added a birthday word sticker from the Jenny Word Stickers sheet.

Under the top left corner of the photo I tucked in one of the floral die cut pieces. Before I adhered it into place I cut off a section that would have been hidden under the photo to use elsewhere on the spread. A little gold star finished off this cluster.
I tucked a piece of paper doily under the bottom edge of the photo along with the cut-off piece of floral die cut.

On the second page I decided on one of the Coco Cardstock Pocket Fronts to hold my journaling card…the black one with white polka dots. (I love that these have their own adhesive on the back ready to go!)
My journaling was printed onto a Taylor Kit journaling card using my computer and printer. I then added two pieces of trim from the Coco Kit at the top of the card with two staples and tucked the card into the pocket.

To decorate the pocket I added a gold foil label, the large die cut floral piece and two more gold stars. I added the words “no ordinary day” from the Jenny Word Stickers sheet and also tucked another small piece of paper doily under the right side of the pocket.

I added a number sticker from the Coco Puffy Alphabet Stickers to a tiny tag from the Noel Kit and added it to some twine with a black tiny tassel from the Joy Kit. I then attached the twine to the top right of the pocket front with a miniwide paper clip, making sure the twine was long enough to hang down under the floral die cut.

All I had to do then was add the date using my FJ Roller Date Stamp and adhere the page into my traveler’s notebook!
I have a video for you below if you'd like to watch my process...
I hope I’ve given you some ideas and inspired you to use the Coco Kit for memories other than Christmas too.
Thanks so much for stopping by the blog today. I look forward to seeing you again with more projects to share in the new year. I wish all of you and your families a very happy 2021!
Sheree x

SUPPLIES: Coco Kit | Coco Paper Pack | Coco Cardstock Pocket Fronts | Coco Die Cut Shapes | Coco Label Book | Christmas Trims Grab Bag | Taylor Journaling Cards | Jenny Word Stickers | Sarah Die Set | Noel Tiny Tags | Joy Tiny Tassels | Essentials Miniwide Paper Clips – White | 12 x 12 Essentials White Cardstock | Traveler’s Notebook Insert
