January 2022 Sketch Challenge | Creative Team
Hello Crafty Friends!
It's Sheree here and today I have a fun new sketch challenge to share with you. I can't wait to show you what the team have come up with! First though, let's take a look at the sketch I've designed or this month...

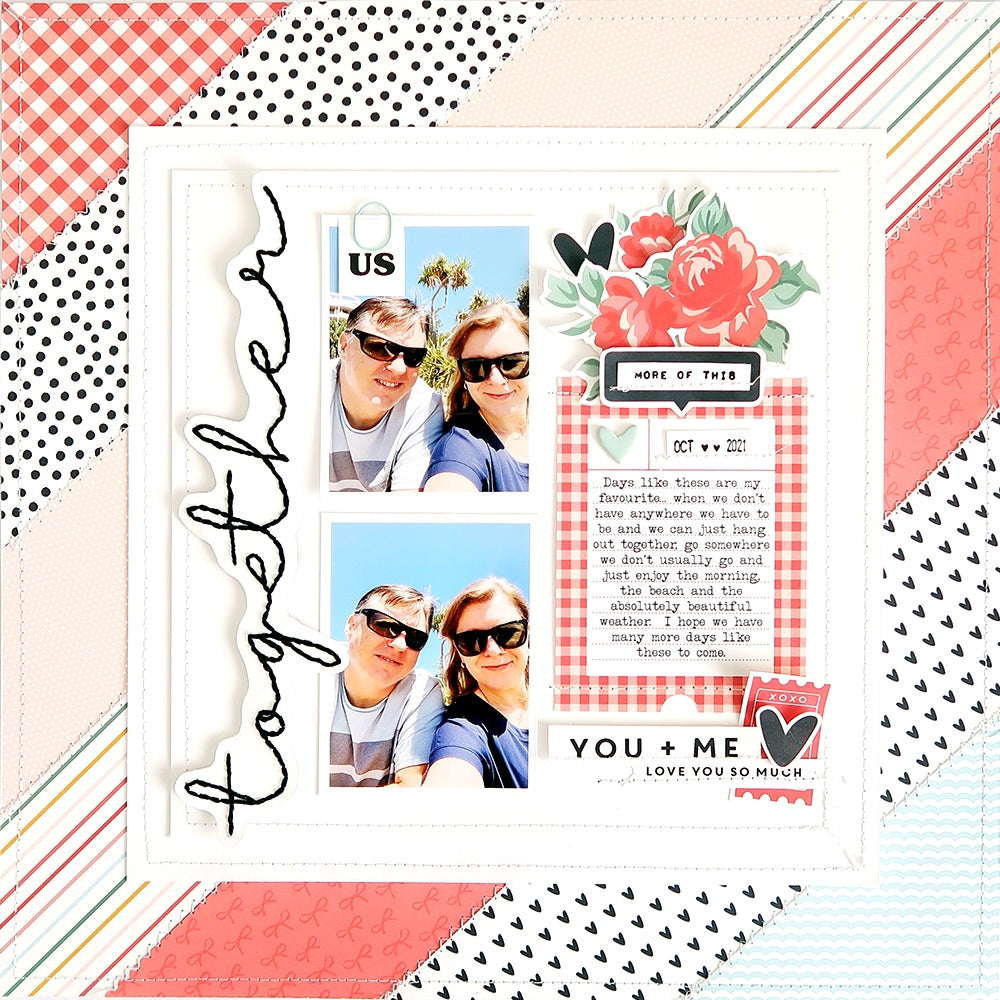
Here is the layout I created with this sketch...

When I created this sketch I had pictured the border as different patterned strips of paper stitched together like a quilt and that’s exactly what I did for my page using papers I printed from the Mabel Digital Kit. It was so fun to use so many patterns on the one page! I used my sewing machine to add lots zig-zag and straight stitching.
For the centre of the page I used two layers of white cardstock with stitched borders. I enlarged and printed the “together” word stamp from the Mabel Digital Kit onto printer paper and used it as a template to pierce holes into white cardstock, then hand stitched the word using black embroidery thread. I fussy cut the title out then added it down the side with foam adhesive.
The photos were adhered into place, then I printed my journaling onto one of the digital Mabel journaling cards which was cut out and positioned to the right of the photos. Printed ephemera and words from the Mabel digital stamps and a chipboard heart were added above and below the journaling. I also attached the word “us” using a miniwide paper clip to one of the photos. More stitching was also added for additional texture.
SUPPLIES: Mabel Digital Kit | June Bits & Pieces | Mari Stamp Set | 12 x 12 Essentials White Cardstock | Essentials Miniwide Paper Clips – Mint | FJ Roller Date Stamp
Our creative team have been busily working their magic with the sketch and their pages are just so inspiring! I just love how each person put their own spin on their projects to make it theirs.
First up, lets take a look at the lovely layout that Laura Balboa has to share...

In my sketch I have used the Mabel Digital Kit. I have used the pink dotted paper that I love for my layout and a torn white card. I have used a single vertical photograph and have decorated with die cuts from the collection. I think it looks beautiful!

SUPPLIES: Mabel Paper Pack | Emily Word Stickers
Ulrike Dold is also here to tell us about her beautiful page...

I am always so in love with Sheree´s sketches and of course I had to use the January sketch to make a layout with the gorgeous digital Mabel collection.
First I cut the black and white dotted paper to 8.5 x 11 Inch and cut then a frame with a width of 2.5 inches. Then I used the Essentials White Cardstock and cut it to 10 1/4 x 7 3/4 inches. I glued it on the frame from the patterned paper.
I wanted to use the sweet photo frames from the gorgeous Mabel Digital Kit and cut the gingham and the dotted one out. I also cut the insides of them out and added two pictures of the Ballet shoot of my daughter behind them and I used liquid glue to fix them behind the frames. I added them central on my layout and the gingham one over the dotted one. Then I also added the frame with the "love" title beside the frame with the dots.
I fussy cut many of the super sweet roses of the floral Mabel paper and added them from the left edge of the bottom over the frames to the right edge on the top of my page. I sometimes used 3D dots to add some dimension. On the borders the roses always end on the border of the white cardstock. Then I added the black big label from the Mabel journaling card and the mint label beside the gingham framed picture. I also added two mini tabs there and some roses too.
I added the title "Love" on the right side of the gingham frame. I used the FJ roller date stamp to add the date on the floral Mabel tab and glued it on the right side below on my layout - justified at the border of the white cardstock. I used the sweet "Love" ticket in red and the black heart die cuts to decorate my 8.5 x 11 layout with more different elements. I added the "xoxoxo" die cut and the little hearts under the "love" frame without a picture, then I used my mini stapler to fix the white cardstock on the top and the bottom of the page with two black brackets.
I wrote a little journaling by hand on the bottom of my page. At the end I used the wonderful Bella Epoxy Dots and the cute Bailey Epoxy Hearts to finish off my 8.5 x 11 inch layout. I hope I could inspire you to create a sketch layout with the wonderful Mabel kit.
xx Ulli

SUPPLIES: Mabel Digital Kit | Bella Flexible Epoxy Dots | Bailey Flexible Epoxy Dots | 12 x 12 Essentials White Cardstock | FJ Roller Date Stamp
Next up we have Karlla Dauer with her pretty page....

I like to find a possibility to add many prints to my projects. I loved creating this background. It reminded me of the time I used to make patchwork. I created a light overlay on top, to highlight the decor elements and photos. I'm enjoying writing by hand on my work. For this project I chose to write in Portuguese (which is my native language) for both the title and the journaling. SUPPLIES: Mollie Kit | Mollie Paper Pack | Mollie Die Cut Shapes | Mollie Stamp Set | Mollie Chipboard Hexagon Stickers | Mollie Chipboard Frames | Mollie Journaling Cards | Essentials Miniwide Paper Clips | Emily Word Stickers | Emily Chipboard Flair
Now let's take a peek at what Kerstin Scheidler has created...

Do you already know the awesome Mabel Digital Kit? She is so beautiful! It's so easy to print your favorite papers or embellishments over and over again.
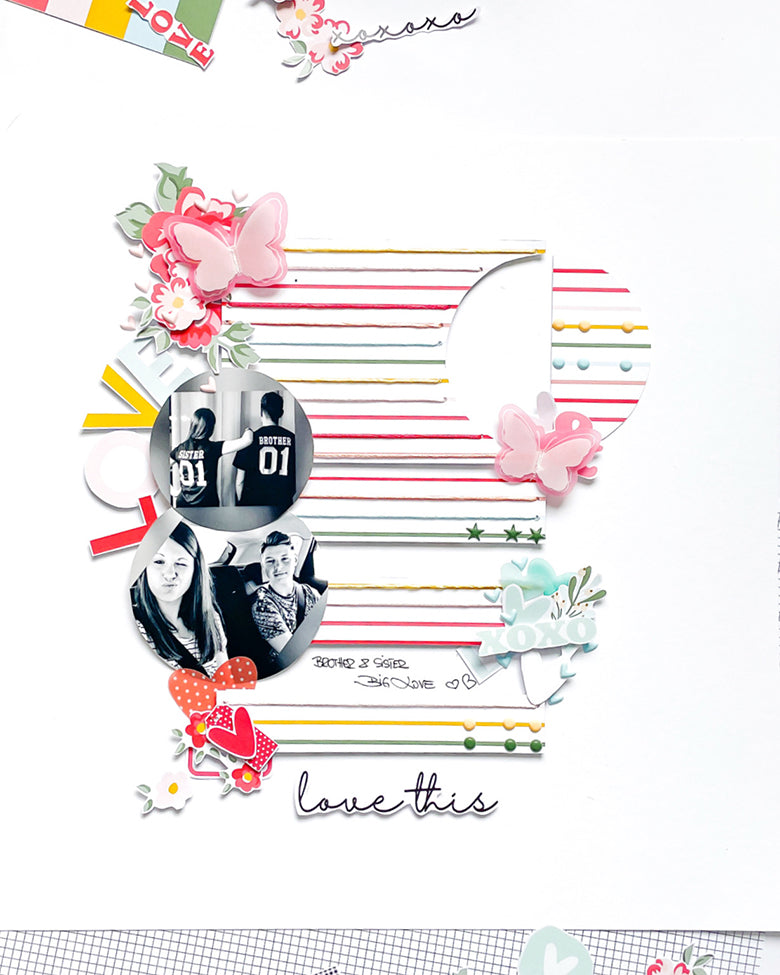
For the - as always - inspiring sketch by Sheree I decided to use the Stripe paper. I immediately had an idea for it...that's how it should be - right?
I cut the striped paper into 5 x 4 1/2 / 2/ 1 3/4 inches and embroidered a few of the stripes with matching color thread. I punched a circle into the 5 x 4 inch. I arranged different elements like flowers, small journaling tags, leaves and hearts on my layout.
I found photos of my kids on my phone, which I had to use right away.
The title "LOVE" I cut out of a journaling card.
Matching Mabel, I have still arranged Vellum Hearts from Bella and Vellum Butterflies from Mari. For me, no puffy stickers may be missing on a layout! The puffy stickers from Amanda fit super to it.
I hope you enjoy my project. Looking forward to see your work!
Kerstin xx

SUPPLIES: Mabel Digital Kit I Mari Layered Vellum Butterflies I Bella Vellum Hearts I Amanda Bitty Puffy Stickers
Our last share today comes from Eva Pizarro. Here she is to tell us about her gorgeous project...

I know I say this every month, but I love this sketch! I love the big frame around the photo and journaling and big title on the side. If you know me, I am very true to sketches, I don't like to alter them so much because that way is easier and I don't have to think that much!
For this layout, I started by doing the background. I did a sketch on a piece of 12x12 cardstock and then cut the pieces out of the gorgeous papers from the Mabel collection. I had printed them in A4 size so I had to use two pieces of paper from the middle lines. Next, I added some texture by using the sewing machine on the lines and the border. Once I had my base done, I added a black and white piece of paper and a white cardstock on top.
For my title, I used the letters from the Mollie Kit. I didn't have two photos so I used three small ones. I decorated them with a few flowers I cut from one of the patterned papers and added a journaling spot on the right. I added a few die cuts here and there and my layout was complete! I love the result! Give this sketch a try I am sure you are going to love it too!

SUPPLIES: Mabel Digital Kit | Mollie Chipboard Alphabet Stickers
Now it's over to you! We'd love for you to join in the challenge too and share your projects with us! You can do that by either posting it on our Facebook page or on Instagram using #fjsketchchallenge. We can't wait to see your creations!
Sheree x

