Love Layout | Sheree Forcier
Hello FJ friends!
Today I have a layout to share with you featuring the gorgeous Jenny Kit!

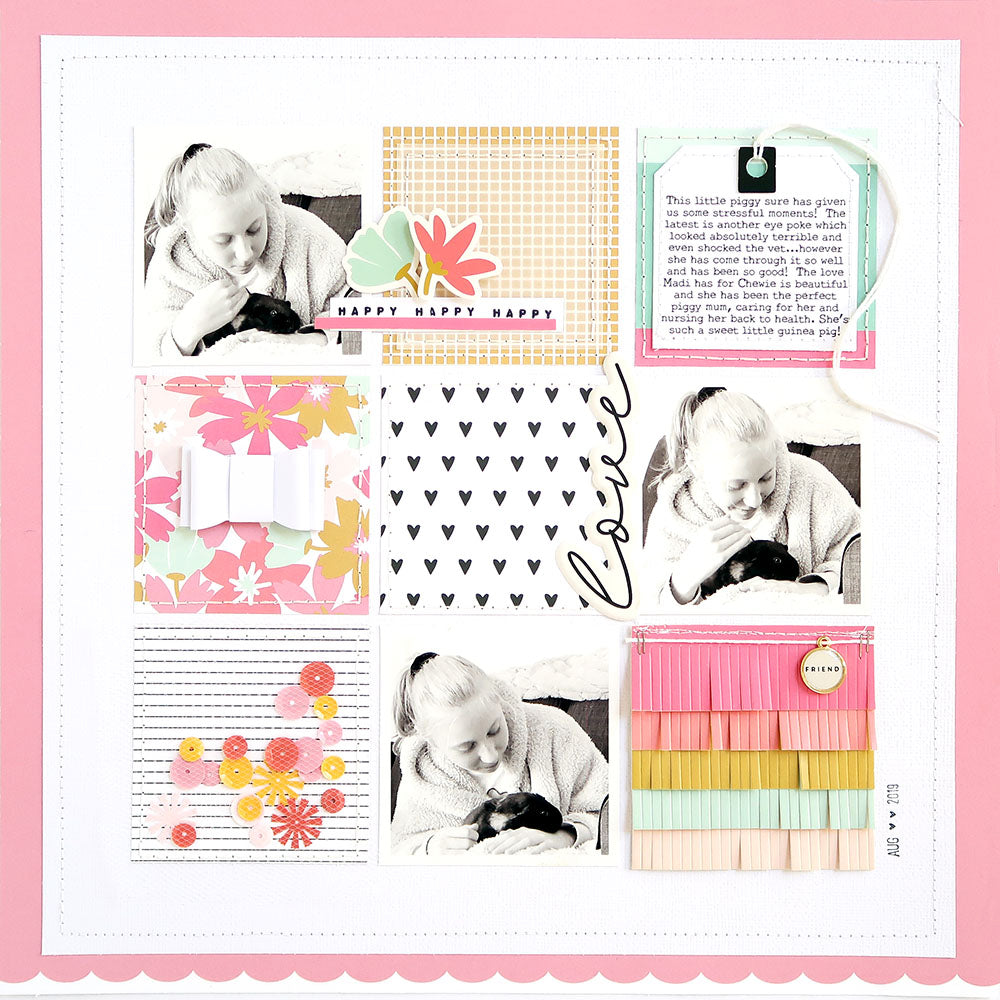
I love a grid layout…don’t you? It’s such a fun way to showcase a variety of papers and I love playing around with how to embellish each little square.

For this page I cut the pink solid colour paper to 12 x 12 ensuring I had the scalloped edge at the bottom, then cut my white cardstock to 11 x 11 to layer on top and machine stitched around the edge. I chose five of the Jenny papers and cut them to the same size as my square photos (roughly 3 x 3 inches each) and arranged everything into a grid formation. For the ninth square I used the cardstock fringe. Keeping the fringe on the backing, I cut the fringe in half which happened to be just the right width I needed, then I just cut a small strip off the top to make the height just right.
Next I used a paper piercer to make some stitching holes around each of the patterned paper squares, then backstitched around each using white embroidery thread. When I got to the bottom left square I layered a square piece of tulle fabric on top of the square as I stitched, then I tucked in some of the Jenny sequins behind the tulle before I finished stitching.

Once the stitching was done it was time for the fun part…the embellishing! Across the top row I started with a photo, then for the mustard yellow square I added a square of vellum, stitched around it, and stamped a row of words from the Jenny stamp set onto some plain white cardstock. This was added to the square along with two flower die cuts, then I remembered the pink strip that I had cut from the top of the cardstock fringe and decided to layer that over the stamped piece.

For the third square on the top row I printed a square of journaling, cut it to a tag shape, stitched around the edge and added the black Elizabeth die cut tab to the top along with some twine.

For the floral square I simply added a white paper bow from the Megan Kit. The middle square was left plain.
The bottom left square was filled with the sequins as I mentioned before. Next to that was another photo, then for the cardstock fringe square I added a row of machine stitching, a length of twine and a Denise Kit charm.

To finish the page I added a puffy title sticker down the side of the photo on the right side of the grid and stamped the date using the FJ roller date stamp.

You can see my process in the video below...
I hope I’ve given you a few ideas that you can use on your next project!

I look forward to sharing another Jenny Kit project with you soon.
Sheree x
SUPPLIES: Jenny Kit | Jenny Paper Pack | Jenny Die Cut Shapes | Jenny Puffy Titles | Jenny Jar of Sequins | Jenny Cardstock Fringe | Jenny Stamp Set | Megan Paper Bows | Elizabeth Die Cut Shapes | Denise Gold Metal + Epoxy Charms | FJ Roller Date Stamp
1 comment
Sheree,
You are SO creative and talented! I love that you video most (if not all) of your projects, I anxiously wait each day to see what project you have created with all the FJ products. I love seeing how it all comes together and watching the videos definitely shows each step process so I truly appreciate that you do this. I am one of those that need to ‘see’ it to be able to recreate it. Thank you and be blessed!