"Love Love" 6x8 Interactive Layout | Tiffany Julia
Hey everyone!
Tiffany here with a fun interactive 6x8 layout of my pup Joey using the gorgeous Millie kit! I planned on having a lot of journaling on this particular layout--which is very rare for me--so I knew beforehand that I wanted it to be interactive in some way so as to hide my journaling. I decided to create the bulk of the layout on a little flap that when opened up revealed my lengthy story behind it. My little Joey has been acting up recently and while he isn't physically ill, he may be at the early stages of canine cognitive decline. His behavior is a bit off and he seems sad and depressed all the time. He is turning 13 years old soon and it makes me really sad to think that we probably have just a few more years with him. So I've had a lot of thoughts and just knew there would be lots of journaling for this one.
I began with a piece of white cardstock that I trimmed to be a tad bigger than 6x8 to be my base (I cut it to the size of the Felicity Jane pocket pages). I then began ripping off pieces from different pattern papers to create my flap and the foundation of my photo cluster. I layered those papers together, adding a bit of white tulle on top, before I began working on my main photo cluster.
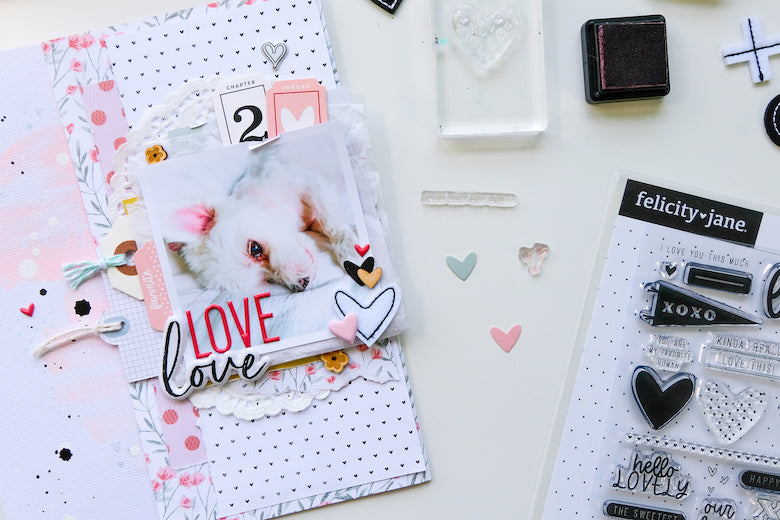
I used a photo of my Joey looking all cosy on my bed. I began by layering some white tissue paper behind the photo. Then I added a piece of that yellow striped pattern paper and one of the Millie journaling cards that had a green striped ledger pattern on it. I played around quite a bit with various different tags I wanted to have poking out from behind the photo on the side until I finally settled on one from the Millie tag set that I layered behind a small shipping tag from my stash. I then added a white doily behind the entire cluster before beginning to embellish.
First, I used a few of the Millie die cut pieces to embellish around the cluster. I added the pink label that says "favorite" on it over the two layered tags poking out from behind my photo cluster. I then added two of the ticket die cuts so that they come out at the top right. I added one of the felt hearts on the bottom right, layering a pink puffy sticker on top of that. I then added a few more heart embellishments around that like the black heart die cut, a heart wood veneer piece from the Krystal kit, and a little red puffy heart sticker. I repeated the wood veneer element about the page by adding two of the flower veneer pieces so that they are half tucked under the photo cluster. I added a white heart puffy sticker from the Brie kit at the top, right above the tickets.

For my title, I used the cherry red Millie puffy alphabet stickers to spell out "Love," then I added the "Love" puffy sticker from the Brie kit underneath that so that it all reads "Love Love."
Once I was done with my flap, I began working on my base page. I pulled out some matching pink paint, various matching ink pads, and some white and black ink, and began creating a mixed media background for my page. I first laid down a messy layer of pink acrylic paint. Then while that was drying, I took the various ink pads in different shades of pink and mint, and using the Millie stamp set, added a few sentiments to the background like different hearts and phrases. Once that dried, I added some white and black ink splatters.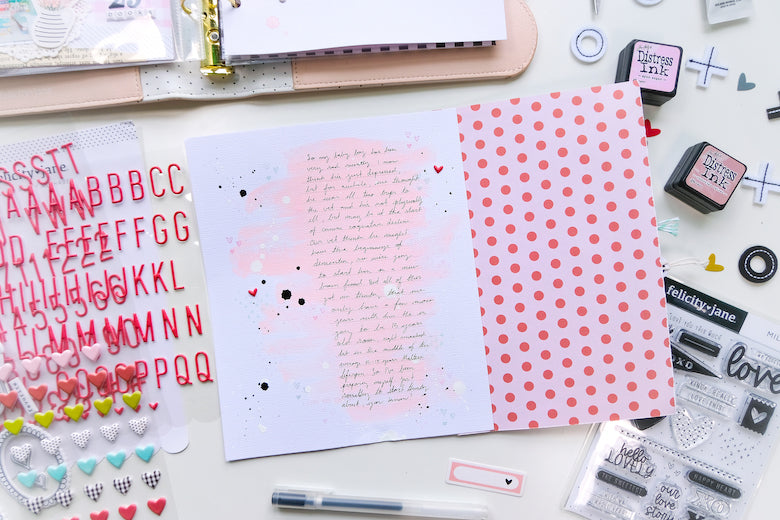
When my base was dry, I added the flap by attaching it to my base page like a tip-in. I love how a bit of the mixed media background peeks through on the side. Once I had my tip-in in place, I did my journaling on my base page, so that when I tip-in the flap it covers up my journaling. I absolutely love how I can tell this longer story but have it all completely hidden! My layout can't really fit into a page protector, but that's okay as I'm going to punch it right into my Note to Self binder!
Definitely check out the entire process below to get a better idea of how this layout came together.
I hope this inspires you to create an interactive layout for your scrapbook to hide some of that longer journaling.
xxx Tiffany

SUPPLIES: Millie Kit | Millie Paper Pack | Millie Journaling Cards | Millie Felt Shapes | Millie Die Cut Shapes | Millie Designer Tag Set | Millie Puffy Heart Stickers | Millie Puffy Alphabet Stickers | Millie Stamp Set | XOXO 6x8 Paper Pack | Krystal Wood Veneer Shapes | Brie Puffy Stickers
1 comment
Although I am not into scrapbooking, I thoroughly enjoyed watching your process. Got some ideas to use in my art journal. Your page is very appealing to the eye, and certainly shows your love for your furbaby! WELL DONE!