'Lovely' TN Layout using the Jaimee Kit | Mandy Melville
Hi friends!
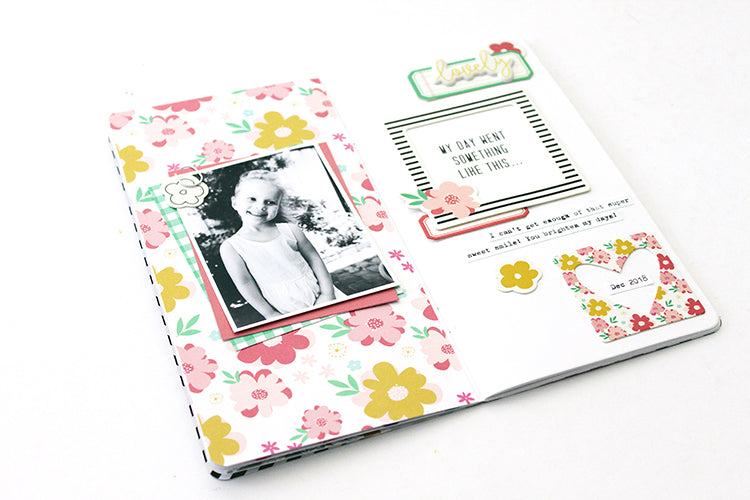
Mandy here with you today to share my first project using the beautiful 'Jaimee' collection! I often like to create a traveler's notebook layout for my first project using the new kit each month as it's an easy project to warm me up and to get a feel for what's in the kit. With all the pretty colours and florals in the Jaimee collection, I really couldn't resist scrapbooking this super sweet photo of my youngest daughter!

I was immediately drawn to the floral patterned paper in this kit! It's so pretty, right?! I decided to feature that paper on my layout by covering the left hand side of the spread with it. It provided a lovely base for me to add my photo to, which I printed in black and white so that it would really pop.

I added a couple of layers behind my photo using one of the solid color papers from the kit, as well as a green gingham journaling card. This helped to add some more interest to the page, as well help the photo to stand out from the background. On the top left hand corner of the photo I also attached a cute little die cut flower using a mini wide paperclip.

Moving over to the right hand side of the spread, I decided to scatter some of the die cut labels and frames from the kit down the page. I chose pieces of different sizes, as well as different colours and patterns, to add lots of visual interest.

I created three points of interest on the page, starting with this little cluster at the top of the page. I layered together a label, a little die cut flower, and a gorgeous puffy word sticker. I LOVE the puffy stickers, they are so soft and smooth! You can also see here how I layered the journaling card that says 'My day went something like this...', behind the die cut frame.
I finished the layout off with a couple of lines of typed journaling, and that was it! It was so quick and easy to put together using all of the beautiful coordinating products in this kit, and I love how the finished layout turned out!

If you'd like to see how this spread came together, you can watch my process video over on my YouTube channel.
Thanks so much for joining me here today today! I hope that you've been inspired by my TN layout. I look forward to sharing some more inspiration using the Jaimee kit later this month.
Mandy x
Supplies: Jaimee Kit | Jaimee Paper Pack | Jaimee Journaling Cards | Jaimee Puffy Stickers | Jaimee Die Cut Shapes | White Miniwide Paper Clips | Traveler's Notebook Insert