Memory Keeping in a Note to Self Binder | Mandy Melville
Hi FJ friends!
Today I want to give you a peek inside my FJ Note to Self binder and show you how I’m using mine. The binders are perfect for using as a planner, and there are some great planner inserts available from Felicity Jane as well, but I wanted to show you that there are other ways that you can use the binders if you don’t want to use them as a planner. I decided on using mine for memory keeping. I put some FJ tabbed dividers into the binder, which divides it into four sections, so that I can have a section for each of my three kids, and another for my husband and I. It will be a mini album of sorts, and once a section is full, I’ll simply take the pages out and use a couple of metal album rings to hold them together. That way I can keep using my binder for the most current layouts that I’ve created!
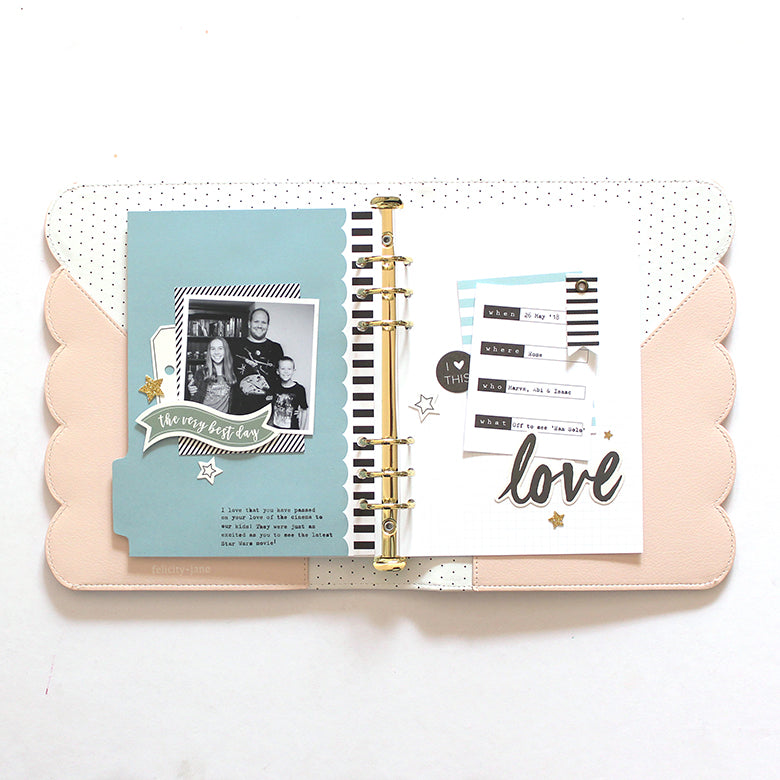
This week our creative team have all been sharing projects focused around Dads, and I’m finishing off the week with this layout in my Note to Self binder, using a mix of kits, and featuring a photo of my hubby with our two eldest kids…

For the page on the left, I used one of the solid colored papers from the Brie kit as the background. Down the inside edge of the page, I also added a strip of black & white striped paper from the same kit. For my journaling, I wanted to write a little note to my hubby, and I decided to use my typewriter to type this straight onto the page.

I also added my photo to the left hand page, and I layered some bits and pieces around my photo to help it to really stand out. I used one of the 3x4 journaling cards from the Brie kit and a tag from the Mila kit to tuck in behind the photo, and I added a few more die cuts from the Mila kit to finish off the photo cluster.

For the right hand page, I used one of the grid inserts that are available to purchase from the shop. I then layered together two journaling cards, one from the Zoey kit, and the other from the Brie kit, and I adhered them to the middle of the page. I used the top one to record the details of the photo. I added one of the Brie fabric flags on the top right hand corner of the journaling cards, and I also tucked a washi sticker from the Henley kit under the left hand side of the cards.

I used the Reagan die cut word ‘love’ as the title for the spread, and I finished it off with a few more stars from the Mila kit.

I hope that you enjoyed taking a look at my first layout in my Note to Self binder. We love to be inspired by you as well, so make sure you share with us what you’re doing in your FJ binder! We have a group on Facebook where you can share your work, and if you’re on Instagram, make sure to use the hashtag #fjnotetoself!
I’ll be back later in the month with another project to share with you. Until then, take care friends.
Mandy x
Supplies: Brie Kit | Brie Paper Pack | Brie Journaling Cards | Brie Fabric Flags | Mila Die Cut Shapes | Zoey Journaling Cards | Henley Washi Stickers | Reagan Die Cut Shapes | Blush Scalloped Note to Self Binder | Note to Self Grid Inserts
