Minime TN Layout | Sarah Zayas
Hello, Everyone!
Today I have a TN spread to share with you using the beautiful Denise collection.

When I first saw the stamp set that released with Denise my eyes were automatically drawn to the "Minime" stamp. People are constantly telling me that my daughter is a miniature version of me, and while she is totally her own person with so many special characteristics that make her uniquely her, I can't help but smile when I see her doing some of the things that I like to do. I decided to use a selfie of us to write about a fun afternoon we spent at the park, reading, eating, and just wandering around.

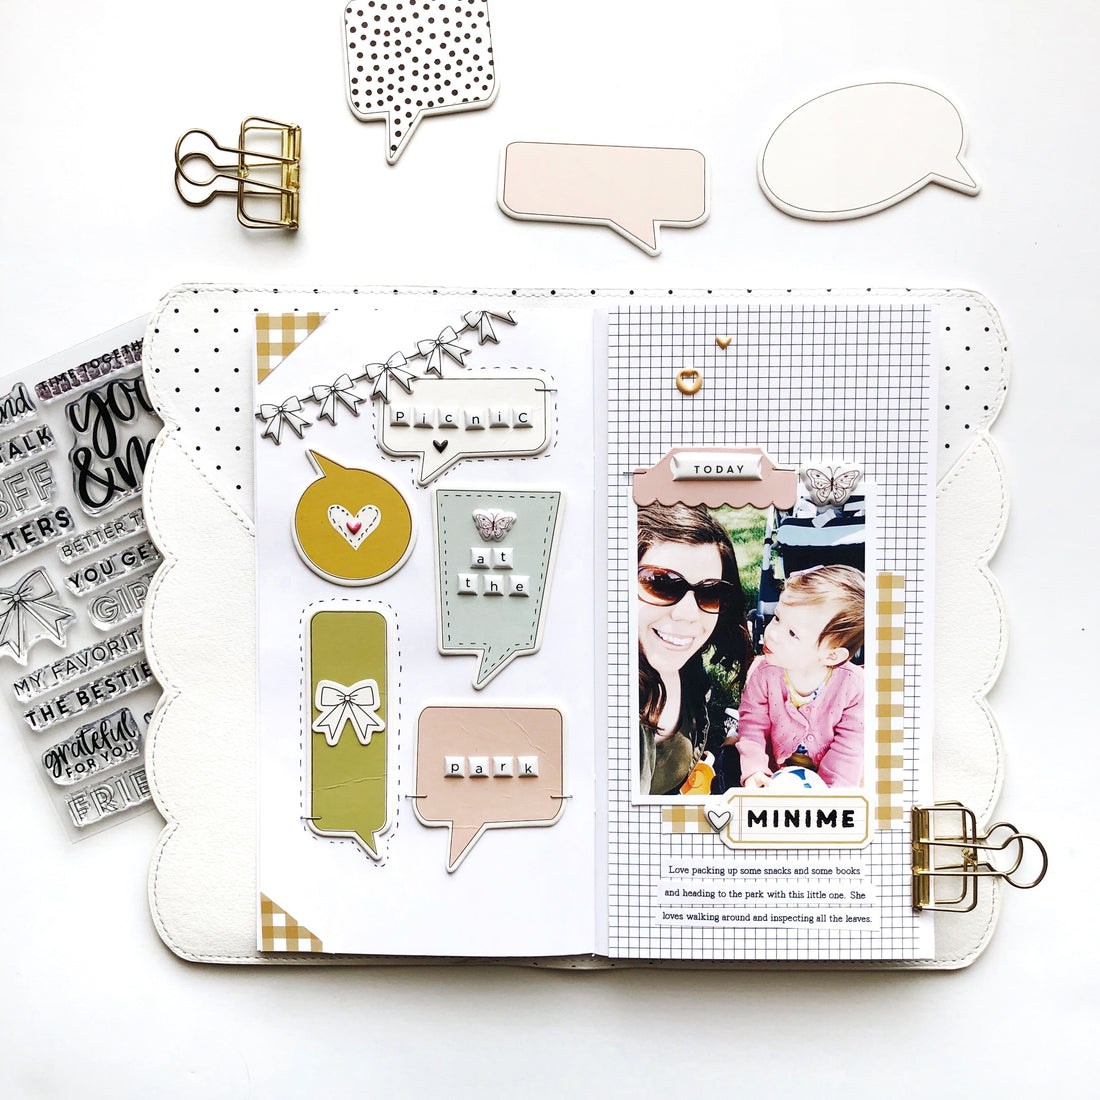
I started with the right side of my spread since that's where I wanted to put my photo. I first adhered one of the Denise patterned papers to cover the entire page so I'd have a bit of a subtle pattern to work with. Next I layered my photo on top of that, adhered my printed journaling strips, and stuck down my label with "Minime" stamped on it. You can see that I eventually added some more stickers and labels to the right side, but I didn't do that until I had worked to get my title on the left side. I typically like to put down all of my essential pieces (photo, journaling, and title) before I add too many small pieces. The small pieces are icing on the cake, and they can also help to balance everything else out.

For the left side of my spread I decided to use some of the cute chipboard speech bubbles that were included in the Denise kit to back up my title and add a grid look. Since I don't like to add too much bulk to my notebooks, I pulled off some of the chipboard layers from each of the speech bubbles. This is really easy to do by just taking something sharp, like the point of some scissors, to start pulling up the back. If you're careful by keeping your chipboard piece flat, you should be able to pull up the layers while keeping the front side totally intact. As you can see from my speech bubbles, I did get some creasing on a few pieces because I was working quickly. This doesn't bother me, but if I bothers you then I'd just recommend taking your time with it. :)

There is definitely still some dimension to the chipboard pieces, but they lay flatter in the notebook, which is nice.

I used some of the Lola Mini Puffy Alphabet stickers to spell out my title on top of the speech bubbles and I used some die cuts and puffy stickers from the Denise collection to fill in the other speech bubbles. A couple of other details that really helped finish off this page were some hand drawn stitching lines in and around a few of the speech bubbles, and also adding a couple of triangles of pattern paper to the corners on the left side. I feel like the mock photo corners help to really close that side of the layout and makes it look like the speech bubbles aren't floating.

I had so much fun using all the pieces from the Denise collection this month. I hope you're enjoying the collection as well!
Happy Crafting!
Sarah
SUPPLIES: Denise Kit | Denise Stamp Set | Lola Mini Puffy Alphabet Stickers | Denise Die Cut Shapes | Denise Paper Pack | Denise Puffy Stickers | Denise Chipboard Speech Bubbles