Mix and Match: Fringed Heart Layout | Kathleen Graumüller
Hey friends, it’s Kathleen here again. I’m sure you have all already seen the stunning April kit called Brooke, right? Unfortunately I can’t show you a project with that kit today because it hasn’t arrived yet, but I thought I would use the waiting time to use up some of the products from the recent Felicity Jane kits. :)
So today’s layout is a mix of products from six different kits in total. I have probably said this before (and will say it again, haha), but one of the things I love most about the FJ kits, is how perfectly they all go together and how easy it is to mix and match them.


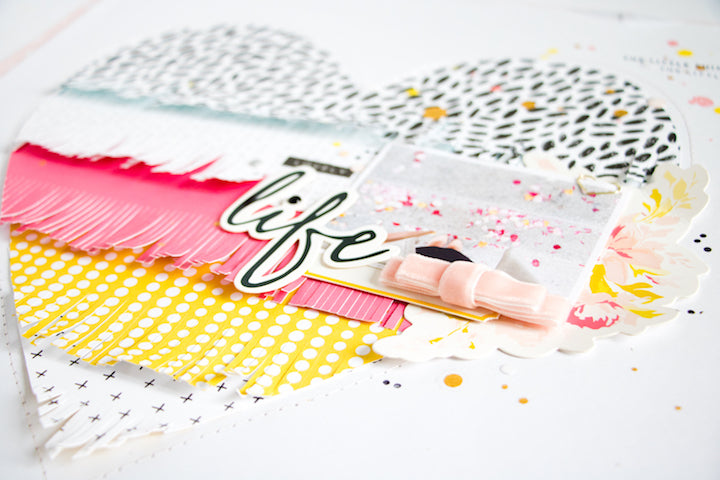
The most part (visually) of this layout is made from the Alexis kit: all the papers came in that kit, as well as most of the die cut shapes (actually all, apart from the word “life“ which came with the Henley die cut shapes).
I’ve been wanting to make a fringed heart layout for what feels like forever, and when I went through my FJ papers and saw that I had a few strips of each of these patterns left, I thought it would be the perfect way to use them up! I tried to mix black and white patterns with some other patterned paper and also solid coloured paper in bright colours.

If you now wonder how in the world I was able to cut the fringe so perfectly even, I didn’t, haha. I used my Silhouette to cut the different layers of the fringed heart. Although you could of course easily do it by hand. It’s just that I had my cutting machine out on my desk when I was working on this layout and I’ve had the perfect cut file already, so I figured, why not use it? ;)
Should you want to make a fringed heart by hand, you could also change up the numbers of layers you want to have! I think this would look really cool if you added even more fringed layers and some more patterns and colours into the mix! Or you could change the size and make a smaller version for cards, as embellishments or as wall art.. so many possibilities!


Because the page felt a little bit empty around the heart, I trimmed down my 12" x 12" sheet of white cardstock and added a patterned paper border. I didn’t want the border to take away from the heart though, so I decided on this soft pink paper with the small heart pattern. And it also matched the colours in the floral die cuts and the velvet bow (from the Reagan kit) beneath my photo.
To finish my page off, I added some paint splatters, a few of the super cute Henley Flexible Epoxy Dots, a golden mini heart clip and a few small stamped phrases from the Zoey stamp set.
And by the way, don’t put your stamp set from the Joy kit too far away! Although it is Christmas themed, it also has some stamps that can easily be used on projects throughout the year. For this layout I used the three dots and scattered them across my page, but phrases like „“making memories“, “family time“ or “the story“, for example, can be used all year around!
I hope this layout inspired you in some way or another. Either to try your hand at mixing and matching your kits, to make a fringed heart (or any other shape) or to give your Christmas stamps a workout on a "regular" page! :)
Thanks for stopping by!
Kathleen
Supplies: Henley Flexible Epoxy Dots | Henley Washi Stickers | Henley Die Cut Shapes | Alexis Paper Pack | Alexis Die Cut Shapes | Reagan Velvet Bows | Joy Stamp Set | Mila Mini Heart Clips - Gold | Zoey Stamp Set | Essentials Bitty Puffy Stickers
