Multi-Photo Pocket Card Tutorial | Andrea Gray
Hi crafty friends! I hope your week is going well! I have a fun little tutorial for you today! I'm using paper and washi from the Summer kit but you can use anything that works with your photos.
Many times when I'm deciding on photos to use for pocket pages - I want to keep several similar photos but my space is limited. We're going to make a little flip book so you can include them all!
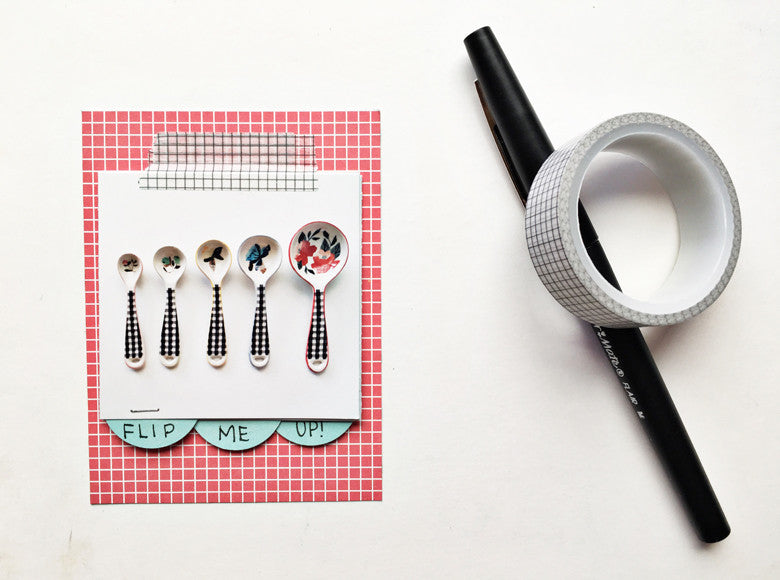
Take these 3 photos for example: They are similar but they all show different parts of these adorable spoons I bought from Anthro and I want to make sure they are all included in this pocket page. So let's talk about the super easy steps!
Step 1: Select photos, trim to be the same size. Select a paper to use as your backing. Select a fun washi tape!

Step 2: We're going to stack these photos to decide which photo you want to be the last photo and use a strip of washi tape to secure it to the card.

Step 3: Place the next photo (in backwards sequence) as if it is flipped up. Line up the sides and the edges with the photo that is already secured down. Place another strip of tape so that the tape is covering half of each photo edge.


Step 4: Repeat that for all the other photos and when you get to the final photo, add that strip of washi just like you've been doing but this time it's just right over the photo and the card.

Now you'll be able to flip to any of the photos and they are nicely secured down. You might find that it got thick if you added several photos but remember that these can go in pockets or traveler's notebooks so thickness can be ignored sometimes!

But I found that with all the photos being equal size - it was difficult to grab one of them and flip it up. I ended up grabbing them all or not the right one.
So to take it further, I added some small tabs to the edge of each photo.
Step 5: You'll need coordinating but contracting paper, a small circle punch and a tiny attacher. Tip: you can use adhesive if you don't want to staple into your photo.

Step 6: Punch out circles from the coordinating paper. You need one for each photo.

Step 7: Line up the circles so they are distributed evenly among the photos. In my case I had 3 so it was easy to eyeball the distance & location they needed to be. Then simply staple the circle to the photo with the circle being on the under side of the photo. Tip: depending on the composition of your photo, you can add the tabs to the sides. I had white space at the bottom so I felt comfortable adding them there.

Step 7: Give some direction! Since this card will be sitting inside of a pocket, I want the reader of my album to know there is something interactive about the page. While I could have slipped the card in the pocket and adhered the photos to the outside of the pocket, I opted to keep them inside. So I added text to each tab that instructs the reader to dig in and see what's hidden.

And now I can slip the finished card into my page and I don't feel bad about not using some of the photos I really wanted to include!

This pages uses everything from the new Summer kit (except for the Enjoy the Weekend card) so if you haven't picked yours up yet - you better hurry! Isn't it amazingly gorgeous!?

I hope you've enjoyed this little tutorial! So go grab some photos and give your family members a little treat when they flip through your album!
See you soon,
Andrea
Products used: June Kit - Summer | Summer Die Cut Shapes | Summer Journaling Cards | Summer paper add-on | Summer solid color paper add-on | Summer Flair | Summer grid Washi Tape

1 comment
So cute! Excellent instructions, too. So talented!