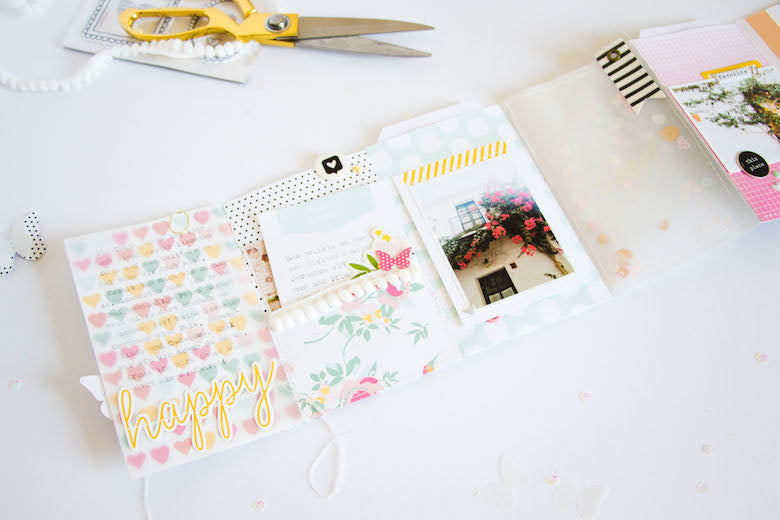
My Happy Place Mini Album | Kathleen Graumüller
Hey there, friends! It’s Kathleen here again and for this week of Summer projects I decided to make a mini album documenting "my happy place", or, well, one of my happy places - but definitely the one where I am the happiest, especially during Summer.
By the way, if you don’t want to read through all of this or don’t have a lot of time, you can also find a short walkthrough video at the end of this post, where you can see the album "in action" ;)


Because this mini was going to be all about Summer and I was going to use photos with lots of bright colours, I thought the Brie kit would be a perfect match! For the basis of the mini album I only used patterned papers from the Brie kit. For embellishing I also stuck mostly to that kit and only mixed in a few other Felicity Jane products from past kits.


The album measures about 3.5"x5.5" when it’s closed and about 21.5"x5.5" when it’s opened; although of course you could add as many more pages to this as you like and thereby make it even longer. I didn’t follow any tutorial or plan everything out from the start, I really just made it up as I went. But I’m definitely very happy with how it turned out (and hope you will like it, too!).
To keep a consistent look, I added all my journaling (except for once) with my typewriter. That also really helps when you don’t like your handwriting (like me). Before I got my typewriter, I rarely added journaling, and if I did, it was usually hidden somewhere. But now I really enjoy the mix of open and hidden journaling in my mini albums. I often make one "entrance page" where I write down what this mini album is about or the important information like the who, what, when, etc. I think this really helps to give this album a purpose.


I used the vellum page to document my feelings about this place and what I like about going there. Then on the other pages I added more journaling about the respective photos, either hidden in a pocket, on a journaling card or beneath a flip-up element.

The third and fifth pages are also full page pockets where I tucked in two large tags (from the Heidi kit) to which I added some text and even more photos. I didn’t want to overload that little mini album with photos but also really wanted to include some more, so this was a great way to do so.


I also made use of the back side of some of the pages to add some more photos and elements, like the gorgeous floral die cut from the Brie kit, or the pretty Bougainvillea leaves (it’s not the flower itself).

Because the pattern on the second page was a bit too bright for that side (it’s the pink grid paper), I decided to use one photo as a full page photo and cover the pattern with it. That way the backside has a very nice and soft look and isn’t as bright and vibrant as the front side.
Throughout my album I also added some stitching with my sewing machine for some added texture and to be able to close the vellum sequin shaker pocket (for which I used sequins from my stash).


And that’s it! I really hope you enjoyed this mini album and it inspired you to get creative, too! If you have any questions, please leave them in the comments below. And don’t forget to watch the walkthrough video to see the album in action ;)
Thanks so much for stopping by today!
Kathleen
Supplies: Brie Kit | Brie Paper Pack | Brie Fabric Flags | Brie Journaling Cards | Brie Chipboard Flair | Brie Die Cuts | Brie Layering Butterflies | Brie Puffy Shapes | Brie Stamp Set | Heidi Stamp Set | Zoey Stamp Set | Brooke Puffy Shapes | Heidi Story Tags | Caroline Rubber Charms | White Pompom Trim
