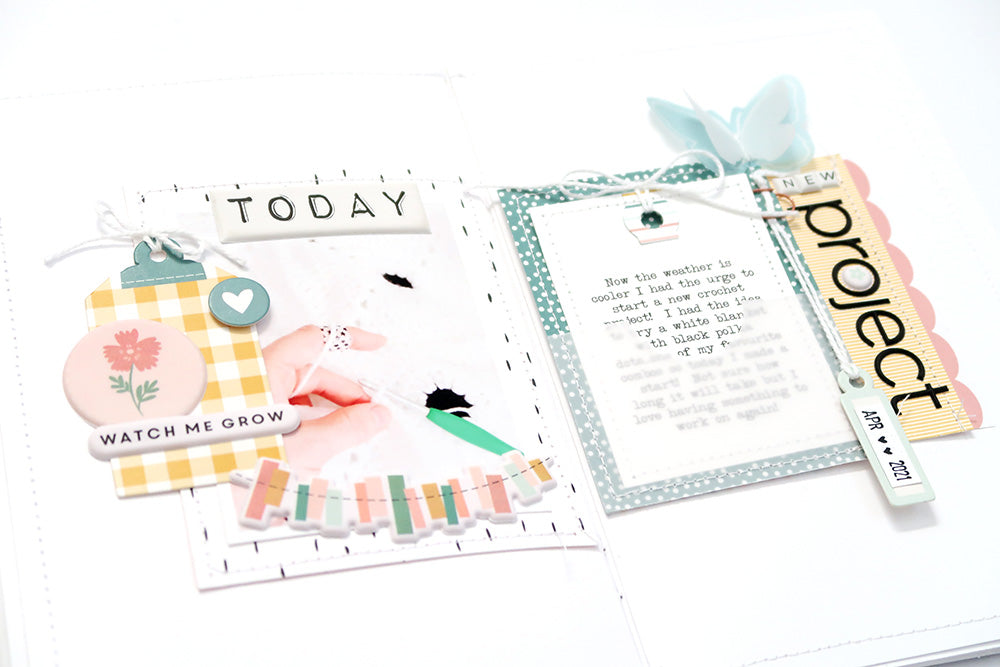
"New Project" A5 Notebook Spread | Sheree Forcier
Hi FJ friends!
I hope you all had a lovely weekend? One of the things I did was continue on with a crochet blanket I started back in April…and that’s what I’m documenting in the project I have to share with you today in my A5 Notebook!

I’ve been creating one spread per month in my A5 notebook this year about things that I want to remember, things that I’m loving and things I’m creating. For this spread I’m using the beautiful May Capri Kit with a few other Felicity Jane products mixed in too. I love how easy it is to co-ordinate items from different kits into one project!
I started by cutting some white cardstock to the size of my notebook pages. I like to create my pages outside the notebook so I can add things like stitching and staples. I does make my notebook a little chunky but I love it that way! I stitched a border around the cardstock pieces before starting to work on my page design.

I had one 4 x 3 inch photo to use for this project and I decided I wanted to create a design going across the middle of the spread. I cut a piece of Spots paper from the Julia kit to go behind my photo, added a stitched border and positioned my photo in the centre. This was then adhered to the centre-right of the first page.

I chose the yellow gingham clipboard die cut from the Capri Die Cut Shapes for the left side of the photo, added twine, two puffy stickers and a small heart die cut to embellish. I then added the Capri puffy banner sticker to the bottom of the photo and a “today” puffy sticker from the Jenny Kit was added to the top.

I printed my journaling onto white cardstock and cut it to a tag shape then added a reinforcer piece to the top that I cut using the Shay Tag Builder Metal Die. I stitched around the tag and added twine to the top.
To hold my journaling tag I decided to create a pocket. I used the blue spotty paper from the Capri 6x6 Paper Pack and cut it to 4 x 3 inches. I cut vellum from my stash to fit across the bottom, punched a half circle from the top edge, then temporarily adhered it into position using washi tape so I could stitch around the edge. The pocket and tag were adhered to the centre-left side of the second page.

I layered a piece of yellow journaling card from the Sarah Kit under the right side of the pocket and added my title using the Lola and Amanda puffy alphabet stickers. I also tucked a piece of scalloped branding strip from the solid colour paper under the title piece.

To finish off I stuck a tiny puffy flower sticker in the centre of the ‘o’ in my title, added a blue butterfly from the Mari Kit and attached a dated tag using a miniwide paper clip.
There is a video below if you'd like to see my process...
It was so fun mixing and matching pieces to create this spread! I hope I’ve given you some ideas to use on your next project and if you haven't tried using an A5 notebook to document your stories I hope you'll give it a try. It's such a fun size to work with!

Thanks so much for stopping by the blog today!
Sheree x

SUPPLIES: Capri Kit | Capri Puffy Stickers | Capri Die Cut Shapes | Capri 6 x 6 Paper Pack | Capri Paper Pack | Essentials Miniwide Paper Clips – Capri Coral | Julia Paper Pack | Amanda Puffy Alphabet Stickers | Lola Mini Puffy Alphabet Stickers | Mari Layered Vellum Butterflies | Sarah Journaling Cards | Jenny Puffy Titles | Shay Tag Builder Metal Die Set | 12 x 12 Essentials White Cardstock | A5 Notebook - Madison Window Pane
