Note to Self Planner Set-up | Andrea Gray
Hey friends! Have you had your eye on the adorable Note to Self Binders that have been restocked? I grabbed the black and white stripe and use it as my everyday planner. You could use this for many things but today I am showing you how I setup mine using the Heidi kit papers and pockets.
I chose several coordinating papers and some fun die cut pieces to decorate with.

I glued two pieces pack to back and then added a coordinating solid as a diagonal piece on top.

Adding Heidi and some other fun embellishments makes this divider easy to look at each time I open my binder!

I also punched tabs using a contrasting paper and added a little label that felt like it fit what that section is about.

My binder has only 2 sections right now so I made a second divider and tab. This section is for tracking my design team tasks so I thought the "create your happy" card was a great addition.

Now for the inside! The first section is solely dedicated to lists - ongoing and immediate. Using the new BOLD alpha stamp set - I created big titles so I can list out all my to-dos.

How amazing is this big chunky and classic font? So good!

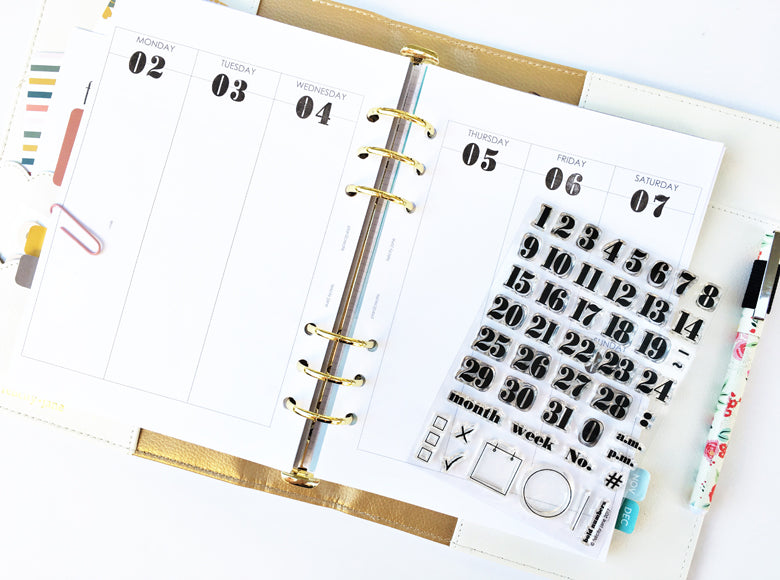
I am also using the bold numbers to number my A5 vertical weekly planner inserts. I love how the numbers stand out within each section!


Decorating dividers and making my binder pretty sure helps me use my planner and the system I have setup for myself. I hope you have fun setting up your binder and using the fun papers and stamps from Felicity Jane!
I also filmed a quick look inside video so you can see it in action! Check it out here:
Have fun planning and organizing and staying on task!
Andrea =)
Supplies: September Heidi Kit | Heidi Paper Pack | Heidi Journaling Cards | Heidi Die Cut Shapes | Heidi Designer Pockets | Bold Alpha Stamp Set | Bold Numbers Stamp Set | Note to Self Binder - Black & White Stripe | A5 Vertical Planner Inserts
