Notebook Layout | Gym Time | Lindsey Lanning
Hello everyone, it’s Lindsey! I’m continuing to work in my A5 notebook where I’m documenting personal accomplishments and just things that I enjoy. Be sure to watch the process video at the end of this post for details on how this layout came together.

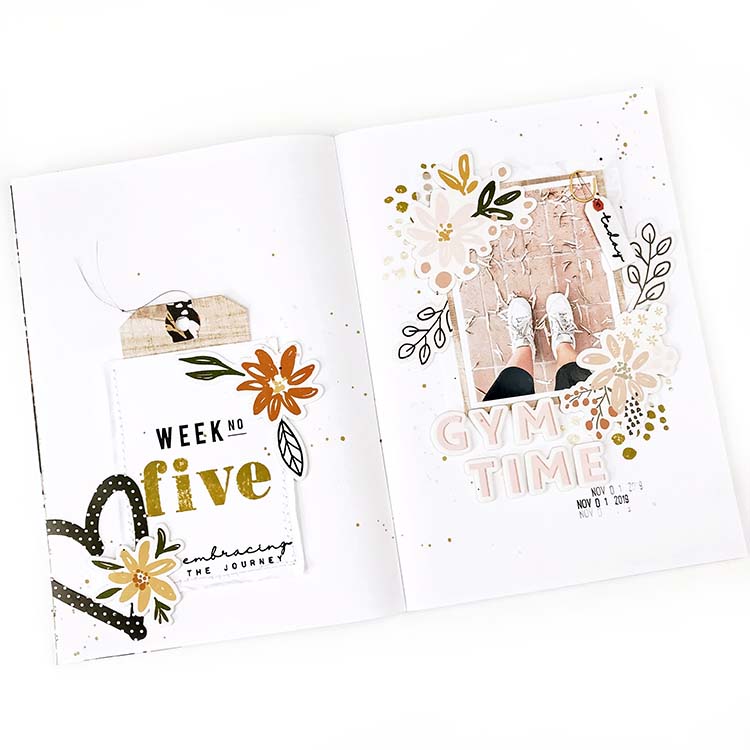
I’ve recently started going back to the gym more regularly and thought I’d keep track of some of my accomplishments and goals in this notebook. I’m not comfortable with gym mirror selfies yet so I went for this simple photo I took while headed to the gym one morning. I love how well the Rebekah Collection will match with the bricks and leaves in the photo.

I still have bits of the Shay Collection on my desk so I used the alphabet stickers for my title, “Gym Time”. I’d also been saving these adorable floral pieces from the Rebekah Collection so I layered them with some stamping with the Rebekah Stamp Set. I wanted to keep the background pretty simple since it’s a smaller layout.

I love to layer lots of different papers behind my photos but for this one I kept it simple with the wood grain paper and some glassine packaging. Thanks to this Creative Team, I’m getting more comfortable with adding lots of little details to my projects like these mini paper clips and one of the rubber tiny tags.

The Shay Tag Stamp and Dies have become a staple in my craft room! Tags in pockets are a great way to add journaling to a project that you might want to keep a little more hidden. I thought about adding more stamping to the front of the tag but I liked the simplicity of this sentiment from the Shay Stamp and how it almost looks like it’s burned into the wood pattern.

One of the many reasons why I love the journaling cards from Felicity Jane is the ability to customize them. Some colored stamping, stitching detail, layered die cuts, and adhered down on only three sides takes this from a simple white card into a fun pocket element.

Most people might keep their weight as some secret journaling on the back of the tag but I’m taking one for the team and sharing how I added journaling to the back of the tag LOL.
I just used the tag die to trace the outline onto some white cardstock and then ran it through my typewriter before die cutting and adhering to the back of the patterned paper tag.

I added some ink splatters as a finishing touch and called it good! I love how this project is coming together and these A5 notebooks give me just enough space but aren’t too overwhelming. Be sure to watch the process video for more details and head on over to the shop to grab some of the remaining Shay and Rebekah products (the Rebekah Collection as a kit is sold out but there are individual items left).
Until next time!
<3 Lindsey

SUPPLIES: Rebekah Kit | Rebekah Paper Pack | Rebekah Die Cut Shapes | FJ Roller Date Stamp | Rebekah Rubber Tiny Tags | Rebekah Journaling Cards | Essentials Miniwide Paper Clips - Mustard | A5 Notebook - Denise Dot | Shay Chipboard Alphabet Stickers | Rebekah Stamp Set | Shay Stamp Set | Shay Tag Builder Metal Die Set | Essentials White Cardstock
