Paper Rosettes Layout | Kathleen Graumüller
Hey friends, it’s Kathleen here again and today I finally have another layout for you! It feels like I’ve been creating Christmas cards and all other kinds of projects in the past few weeks but rarely any layouts. And I must admit, I am very happy with how this one turned out!
For this page I mainly used the beautiful Jill kit, which is full of soft colors. When I first looked at this kit, the first thing that popped into my head was “calm“ because that’s what it made me feel like, after all the red and green and bright Christmas colors everywhere in the past month. Don’t get me wrong, I like them. But I’m also really ready for a fresh start! :)
But, enough of me rambling, let’s have a look at the layout I created:


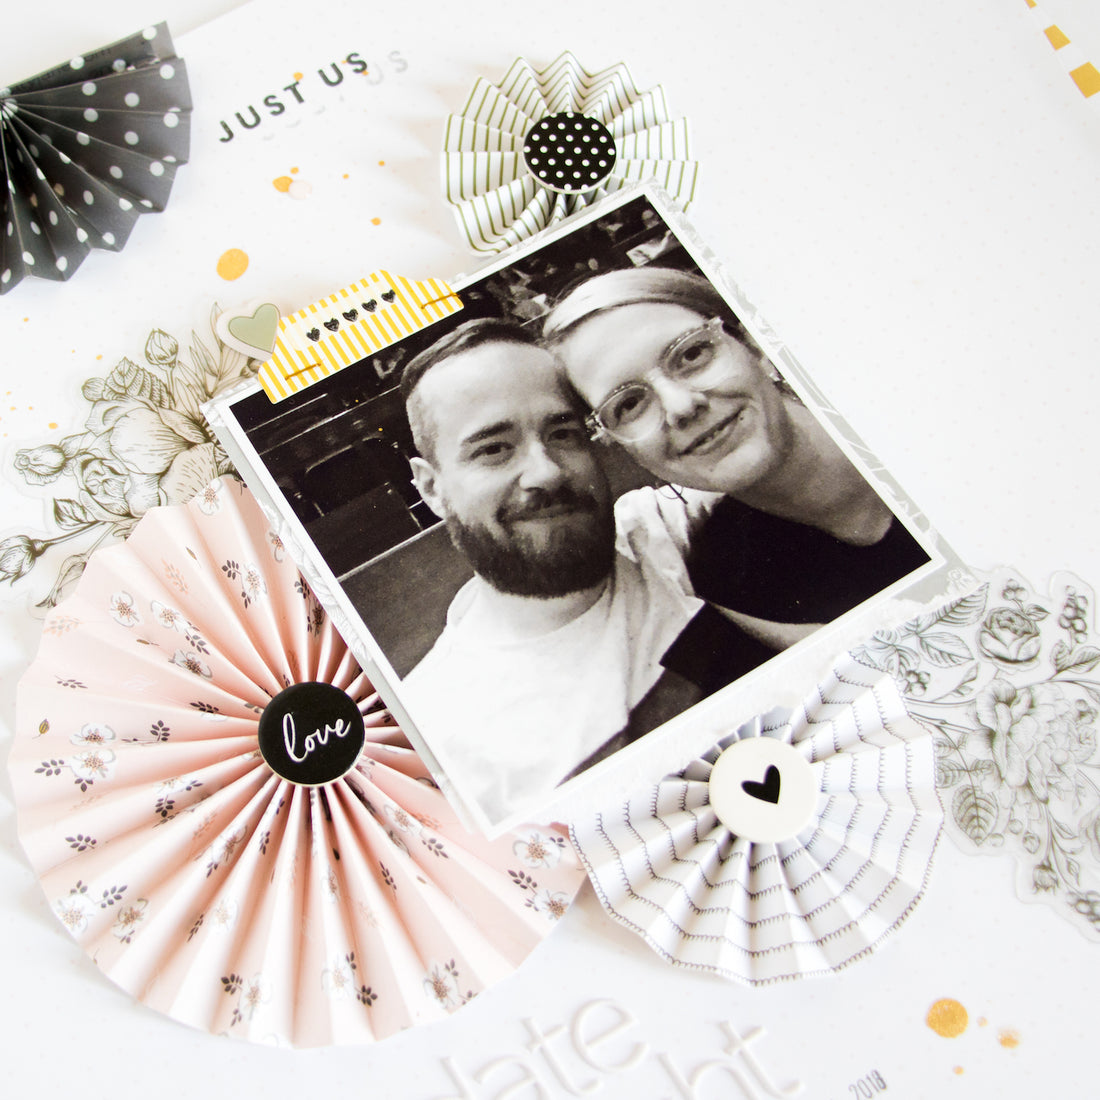
I don’t know what made me think of paper rosettes, but for some reason I really wanted to use the papers and vellum sheets in the Jill kit to create some of them. To make them, you don’t need any fancy dies or electronic die cutting machine. Although they do make the job a little quicker and easier, but I was way too lazy to get my Silhouette Portrait hooked up and since I only have one size die and I wanted rosettes in different sizes, making them by hand it was.
For the biggest rosette I cut a paper strip down to roughly 2“x12“, scored it every 3/8“ and then folded it and glued it together. It’s best to use a hot glue gun to hold these things together because regular liquid adhesive is usually not strong enough. But I didn’t know where mine was, so I used regular glue but attached a circle I punched out of patterned paper (about 1“) to the back and that chipboard flair from the Brie kit to the front to keep everything in place.

All of the other rosettes were made the same way, I just varied the length and width of the paper strips so I would get different sizes. I did keep the scoring interval the same though, so all the rosettes would have the same height on the page. For the half rosettes at the top and bottom of the layout I used the vellum sheets that are included in this month’s kit. The designs on them are beautiful and you can use them for so many things!
To fill some of the white space around my photo, I added two of the floral elements from the acetate shapes and I think they look absolutely stunning! For the title I used the white puffy alpha stickers from the kit (I love that font!).


The final touches were some golden paint splatters, that striped paper strip peeking out on the right side of the layout and a little bit of stamping. The “Just Us“ phrase is from the Essentials Mini Stamp Set 2 and for my date I used the FJ roller date stamp.
Oh, and this is another layout that I didn’t use white cardstock for my background for! It’s a very subtle light pink dot grid and that paper is part of the new Essentials 12x12 Grid & Dot Grid Paper Pack and I absolutely LOVE it!
I hope you like this project and give making your own paper rosettes a try, too! Thanks a lot for stopping by!
Xo, Kathleen
Supplies Used: Jill Kit | Jill Paper Pack | Jill White Puffy Alphabet Stickers | Jill Acetate Shapes | Jill Designer Vellum Sheets | Essentials 12x12 Grid & Dot Grid Paper Pack | Essentials Mini Stamp Set 2 | FJ Roller Date Stamp | Brie Chipboard Flair | Henley Flexible Epoxy Dots
2 comments
Thank you so much, Julie!! :)
Loving this layout & those rosettes!