Planner Dashboard and Dividers | Anita Patel
Hello! Hope you're all having a great week! I got a slow start to the new year but am finally getting organized and moving forward with several projects I'd like to complete this year. One of those projects was setting up my planner with some fun dividers and getting each section ready so I can be productive.

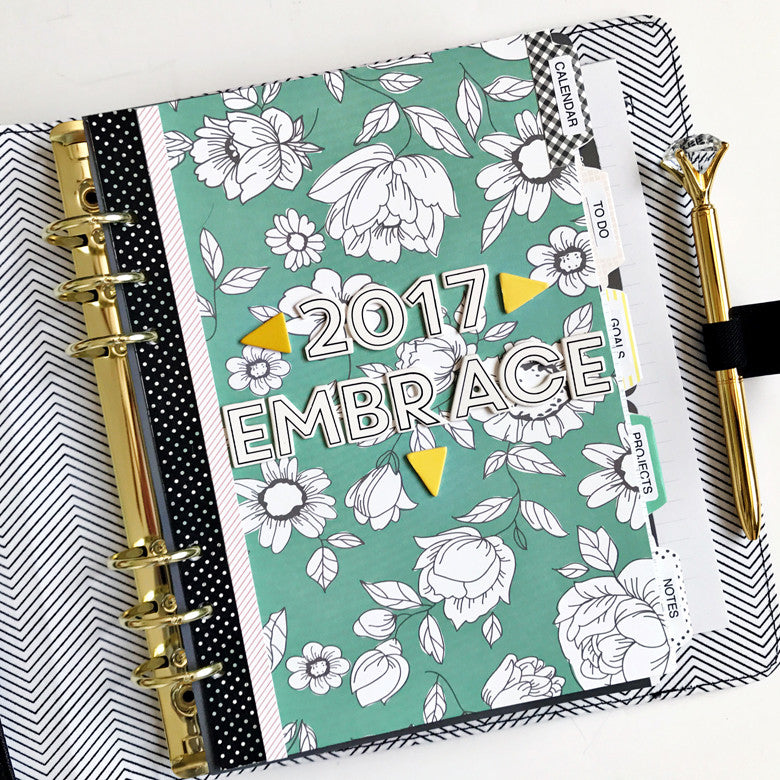
The patterns in this month's Felicity Jane London kit are so pretty and I thought they would complement the inside of my new planner very well. I chose some of my favorite patterns and cut them down to A5 size. The green floral is my favorite so I decided to highlight that pattern and use it as my dashboard. Once I cut down the papers, I added a strip of the cute black and white polka dot washi tape (from this month's kit) down the left side of each divider. I then cut very thin strips of the pink and white striped patterned paper and adhered them right next to the washi tape on each sheet to add a decorative touch. Afterwards, I punched holes in each divider so I can easily insert them into my ring bound planner. Here's how they turned out:

Next, I "embellished" my dashboard. My word for this year is "embrace" and I wanted to include it on my dashboard so that every time I open my planner, I'm reminded of my word. I used the awesome London chipboard alphabet to add the year and the word "embrace" directly onto the floral pattern and then added a few of the London chipboard triangle shapes to add a pop of yellow.

Once I completed the front of my dashboard, I added tabs to each divider to notate each section in my planner. Truth be told, this entire project was designed around those cute tabs that were included in this month's cut-apart sheet. I cut out each tab and then printed the name of each section of my planner onto a piece of paper. Then I just cut out the section names, adhered them onto the tabs and then adhered the tabs onto the dividers. Easy peasy!

Here's how my new dashboard and dividers look inside my planner. I love how they turned out and it makes me happy to look at them in my planner each day!

Hope this gave you some ideas on how to incorporate your London kit in your planner. Enjoy the rest of your week and happy planning!
Supplies Used: London Kit | London Paper Add-On | London Chipboard Alphabet | London Chipboard Shapes
