Pocket Pages with Gabby Kit Journaling Cards | Sheree Forcier
Hello FJ Friends!
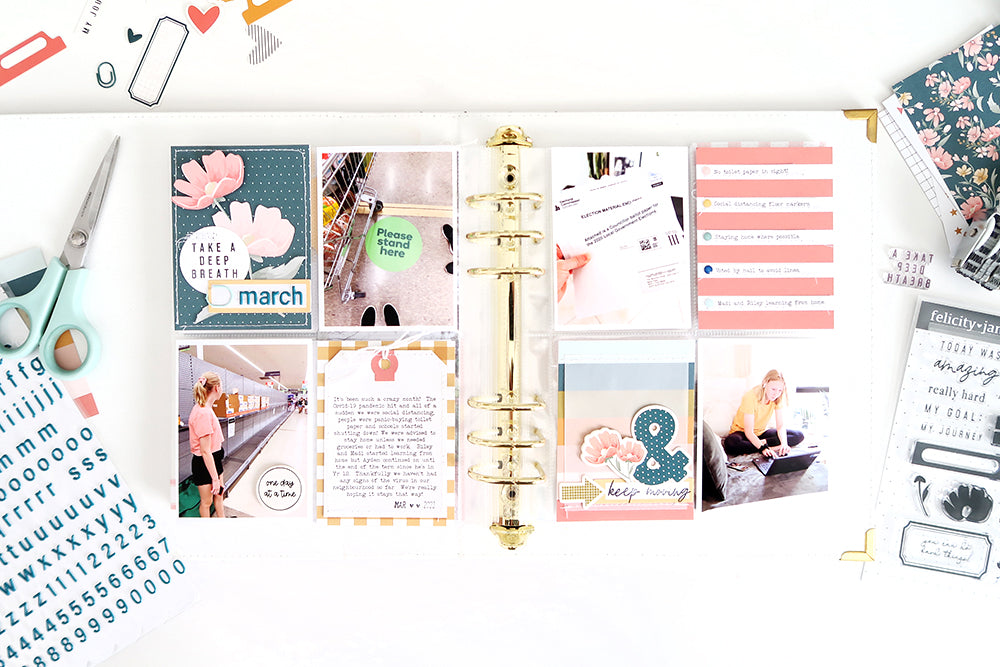
I’m always excited to see the journaling cards in the kit each month and I certainly wasn’t disappointed with the Gabby Kit…they’re gorgeous! Felicity Jane journaling cards are always so much fun to customize to suit whatever project you might be working on. I picked out a few of my favourites to use on this pocket page spread…

I went with the dark blue polka dot card, the mustard gingham card, the striped coral card and then I decided to use the back of one of the bonus 6 x 4 cards that were included in the paper pack this month. I just adore the multicoloured stripes!

I got to work on the blue card first. I stitched around the edge, then added a fussy cut floral from the beautiful floral patterned paper. I grabbed a yellow label from the Katherine Kit then added the word “march” using the Gabby Puffy Alphabet Stickers. These alphas are such a great size! I added a miniwide paper clip to the side of the label for an extra bit of colour. On some white cardstock I stamped a phrase from the Gabby stamp set then punched it into a circle. I layered it with the label onto the bottom right of the card, then added a little messy stitching to the top of the circle.

At the bottom of the first page is some journaling. I printed my text onto white cardstock, cut it to a tag shape and added a reinforcer piece to the top which I cut from the solid colour paper in the kit using the Shay Tag Builder Metal Dies. I stitched around the edge of the tag, added some twine, then adhered it to the centre of the mustard gingham journaling card. I also added a chipboard piece to the bottom corner of the photo.

At the top of the second page I decided to add a list of some of the things happening that month. I printed the journaling and cut it into strips to fit into the white stripes on the coral striped card. The journaling strips were adhered into place before stitching was added across each one. For a little extra colour on this card I added some flexible epoxy dots to the beginning of each strip.

For the last journaling card I used the multicoloured card. I cut it down to size and added a piece of vellum to the centre before stitching across the top and bottom. I stamped “keep moving” from the Gabby stamp set onto another yellow label then created a little cluster on the bottom right of the card using the stamped label, the die cut ampersand, a chipboard floral and a die cut arrow.
You can see my process in the video below...
I’m loving the Gabby Kit and I’m so happy with how this spread turned out! I hope I’ve given you a few ideas you might like to try on your next project.

Thank you so much for stopping by the blog today! Have a lovely weekend!
Sheree x

SUPPLIES: Gabby Kit | Gabby Journaling Cards | Gabby Paper Pack | Gabby Stamp Set | Gabby Die Cut Shapes | Gabby Chipboard Bits | Essentials Label Stickers No. 1 | Tori Flexible Epoxy Dots | Sarah Flexible Epoxy Dots | Essentials Miniwide Paper Clips – Mint | Essentials White Cardstock | FJ Roller Date Stamp | Noel 6 x 8 Album Black Polkadot
