Reading List Passport Notebook | Sarah Zayas
Hello, Everyone!
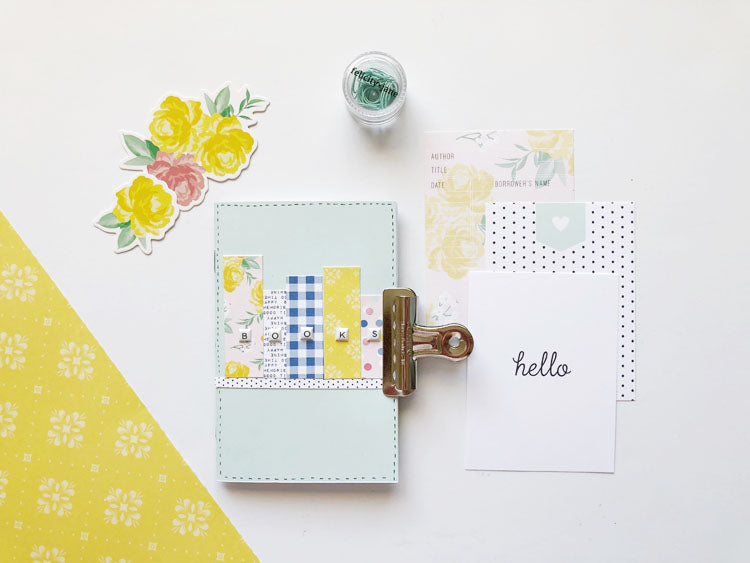
Today I'd like to share a new project that was completely inspired by the library cards that released with April's SARAH kit. I've loved working on traveler's notebooks and mini books to document what I'm currently reading in the past, so I knew it's something I'd like to try to do again for this year. However, I knew I couldn't take on a new annual project that was going to take up a lot of time, so I wanted to create something small that I could easily add a photo into, add some embellishments, and call it done. That's where today's passport size notebook comes in.
For this project I decided to make my own small notebook so I could customize the cover. The final notebook ended up being 3.5 inches by 5.5 inches, which is roughly the size of a passport.

First, I trimmed down my printer paper and a piece of the blue cardstock from the SARAH kit. Each piece was 5.5 inches tall, and over 7 inches wide (I left some extra room widthwise so I could cut down all of the pages together later on). I folded all of my pages in half using a bone folder and then clipped everything together so the pages wouldn't move while I manually stapled the spine.

Since I don't have a long arm stapler, I went ahead and added my staples manually. All you need for this step are a few staples, and a guide that will help you punch holes in your notebook spine.

I laid my guide on top of the spine and used a push pin to add the holes to my spine. It helps if you add a mousepad or something with cushion under your notebook so the pin pushes through more easily. Then I threaded my staples through the holes and manually closed the ends on the inside of the notebook.

The final step was to use my exacto knife to run along the edge of my notebook. This gave the edge of my book a nice clean cut so all the pages would line up.

For my cover I used the patterns from the 12x12 paper pack cover to cut small rectangles out of. I wanted these little rectangles to mimic the look of books so I kept them pretty skinny and varied the height of each one.

I decided to keep the inside of my notebook really simple by just adding in 3x4 photos of some of the books I've read so far this year and then adding some die cuts to embellish. My goal for this notebook is to keep it really simple so I can complete a page in just a few minutes.

I'm so happy with how this cute little notebook turned out and I can't wait to add more books to it as I continue on my reading journey this year!
Happy Crafting,
Sarah
Products Used: Sarah Kit | Sarah Stamp Set | Sarah Journaling Cards | Sarah Paper Pack | Sarah Die Cut Shapes | Sarah Library Cards | FJ Roller Date Stamp
