Take 3 Challenge | Shannon Dombkowski
Hi there Felicity Jane friends!
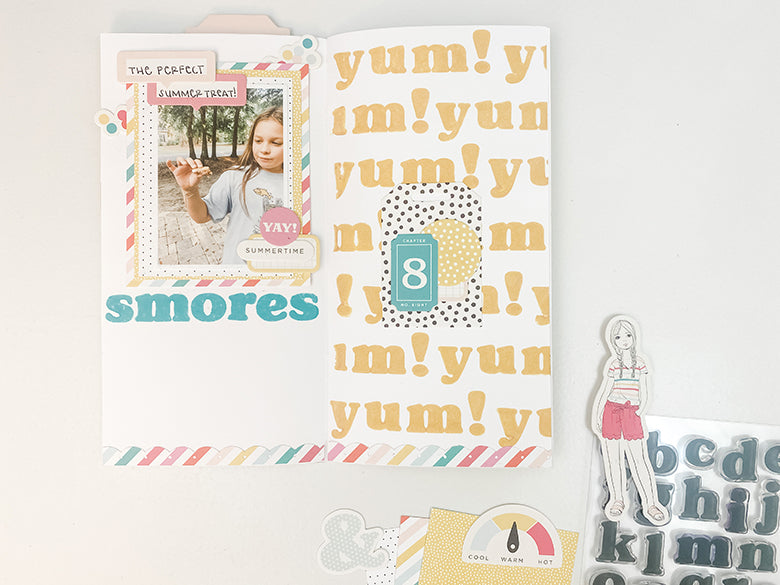
Shannon here with a summery traveler's notebook layout. I focused on using only three products to put this layout together - Annie 6x6 Paper Pack, Annie Die Cut Shapes, and Annie Stamp Set. Let's look at how I did that!
First, let's talk about the patterned paper. Most often, I use my patterned paper to layer behind my photos. I love the color and focus that it brings to my photos. It helps to draw the eye to where I want it to focus. In addition to layering, I also used a border punch to make a small strap to line the bottom of both pages.
Next, let's look at the die cuts. These are always my favorite part of any kit. I started with the tag on the right page. I knew that I wanted it to be in the center of the page so I pulled a few die cuts to layer in the center. Then, I pulled a few that could go around my photo. I decided to add my simple journaling in the rectangle speech bubbles.
Finally - stamps! I'm a huge fan of repeated stamping on a full page of a traveler's notebook. I don't often do it with alphabet stamps forming a word, though. You really need the right font to do it and this fun retro font of the Annie stamp is just perfect! I decided to use it to stamp a title under my photo as well. I strategically chose bright colored ink to add to the summery feel of my page. Smores might only be a thing in the United States but trust me - they scream summer.
If you've never tried picking out very limited supplies to make a page, I highly recommend it! It's a great exercise in creativity and thinking outside the box.
xo,
Shannon

SUPPLIES: Annie Kit | Annie 6x6 Paper Pack | Annie Die Cut Shapes | Annie Stamp Set | Traveler's Notebook Insert - Sunshine Stripe
