"Today" Mini Album | Eva Pizarro
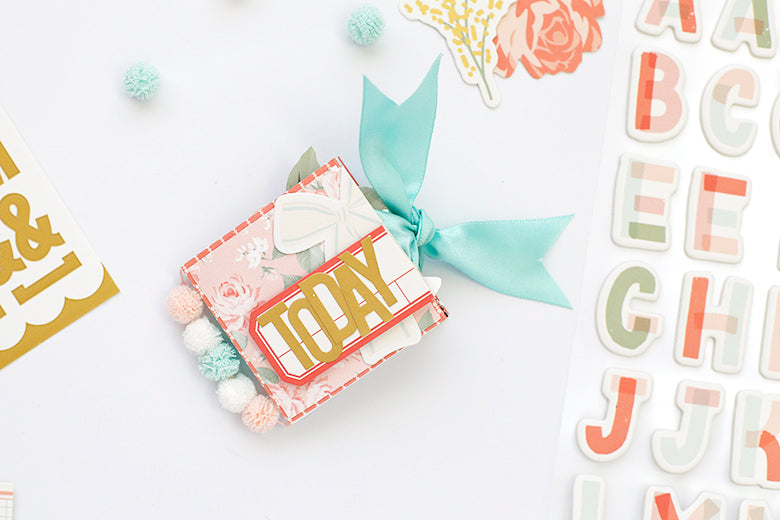
Hello everyone, It's Eva on the blog today, sharing a tiny mini album made with the 6x6 cut out pages from the Margot Kit.
As soon as I saw those 6x6 pages I knew I wanted to create a mini album. A smaller mini album is great because you can finish it faster and you don't need that many photos. I documented an entire day and used 6 photos.
To create the mini album cut out two squares from the 6 x 6 inch papers. You are not going to use those. Cut the paper along the blue lines and score the black lines (see picture).

Starting with the paper on the right, glue two squares together creating a mini album page. Next, glue the following square with the one underneath. Repeat this process until you finish all the squares. Some pages will have the designs upside down, don't worry, you can cover them with a photo later.
Do the same with the paper on the left, only this time, glue the first square to the already made mini album. It looks complicated but I can assure you it is easier when you have all your papers ready.

Before gluing the squares on the first and last page, do a small cut on the pages and put a ribbon.

Using a needle, gather 5 Tulle Pompoms and tie them to the spine of the album. Aren't these pompoms cute?

For my title, I used these golden letters and embellished with some Margot die cuts.

And here's the inside of the mini. I used mostly the die cuts from the kit, but I also included some word stickesr from Emily and some vellum hearts from Bella.

To record my hours, I used the Puffy Alphabet from Emily. I love those tiny numbers.


Thanks for joining me today! if you have any doubts on how to create this small project, leave a message!
Eva

SUPPLIES: Margot Kit | Margot 6 X 6 Cut Apart Sheets | Margot Tiny Tulle Pom Poms | Margot Die Cut Shapes | Emily Word Stickers | Emily Puffy Alphabet Stickers | Bella Vellum Hearts
As soon as I saw those 6x6 pages I knew I wanted to create a mini album. A smaller mini album is great because you can finish it faster and you don't need that many photos. I documented an entire day and used 6 photos.
To create the mini album cut out two squares from the 6 x 6 inch papers. You are not going to use those. Cut the paper along the blue lines and score the black lines (see picture).

Starting with the paper on the right, glue two squares together creating a mini album page. Next, glue the following square with the one underneath. Repeat this process until you finish all the squares. Some pages will have the designs upside down, don't worry, you can cover them with a photo later.
Do the same with the paper on the left, only this time, glue the first square to the already made mini album. It looks complicated but I can assure you it is easier when you have all your papers ready.

Before gluing the squares on the first and last page, do a small cut on the pages and put a ribbon.

Using a needle, gather 5 Tulle Pompoms and tie them to the spine of the album. Aren't these pompoms cute?

For my title, I used these golden letters and embellished with some Margot die cuts.

And here's the inside of the mini. I used mostly the die cuts from the kit, but I also included some word stickesr from Emily and some vellum hearts from Bella.

To record my hours, I used the Puffy Alphabet from Emily. I love those tiny numbers.


Thanks for joining me today! if you have any doubts on how to create this small project, leave a message!
Eva

SUPPLIES: Margot Kit | Margot 6 X 6 Cut Apart Sheets | Margot Tiny Tulle Pom Poms | Margot Die Cut Shapes | Emily Word Stickers | Emily Puffy Alphabet Stickers | Bella Vellum Hearts
